Easily update your Minecraft server to the latest or preferred version using AA Game Hosting’s Game Panel.
This guide walks you through updating Java, selecting the correct version, and launching your updated server in just a few steps.
Steps to Update Your Minecraft Server
Note:If you're planning to use an older version of Minecraft, skip to Step 2 and install the correct Java version for that specific Minecraft version from the Mod Manager.
If you want the latest version, start from Step 1.
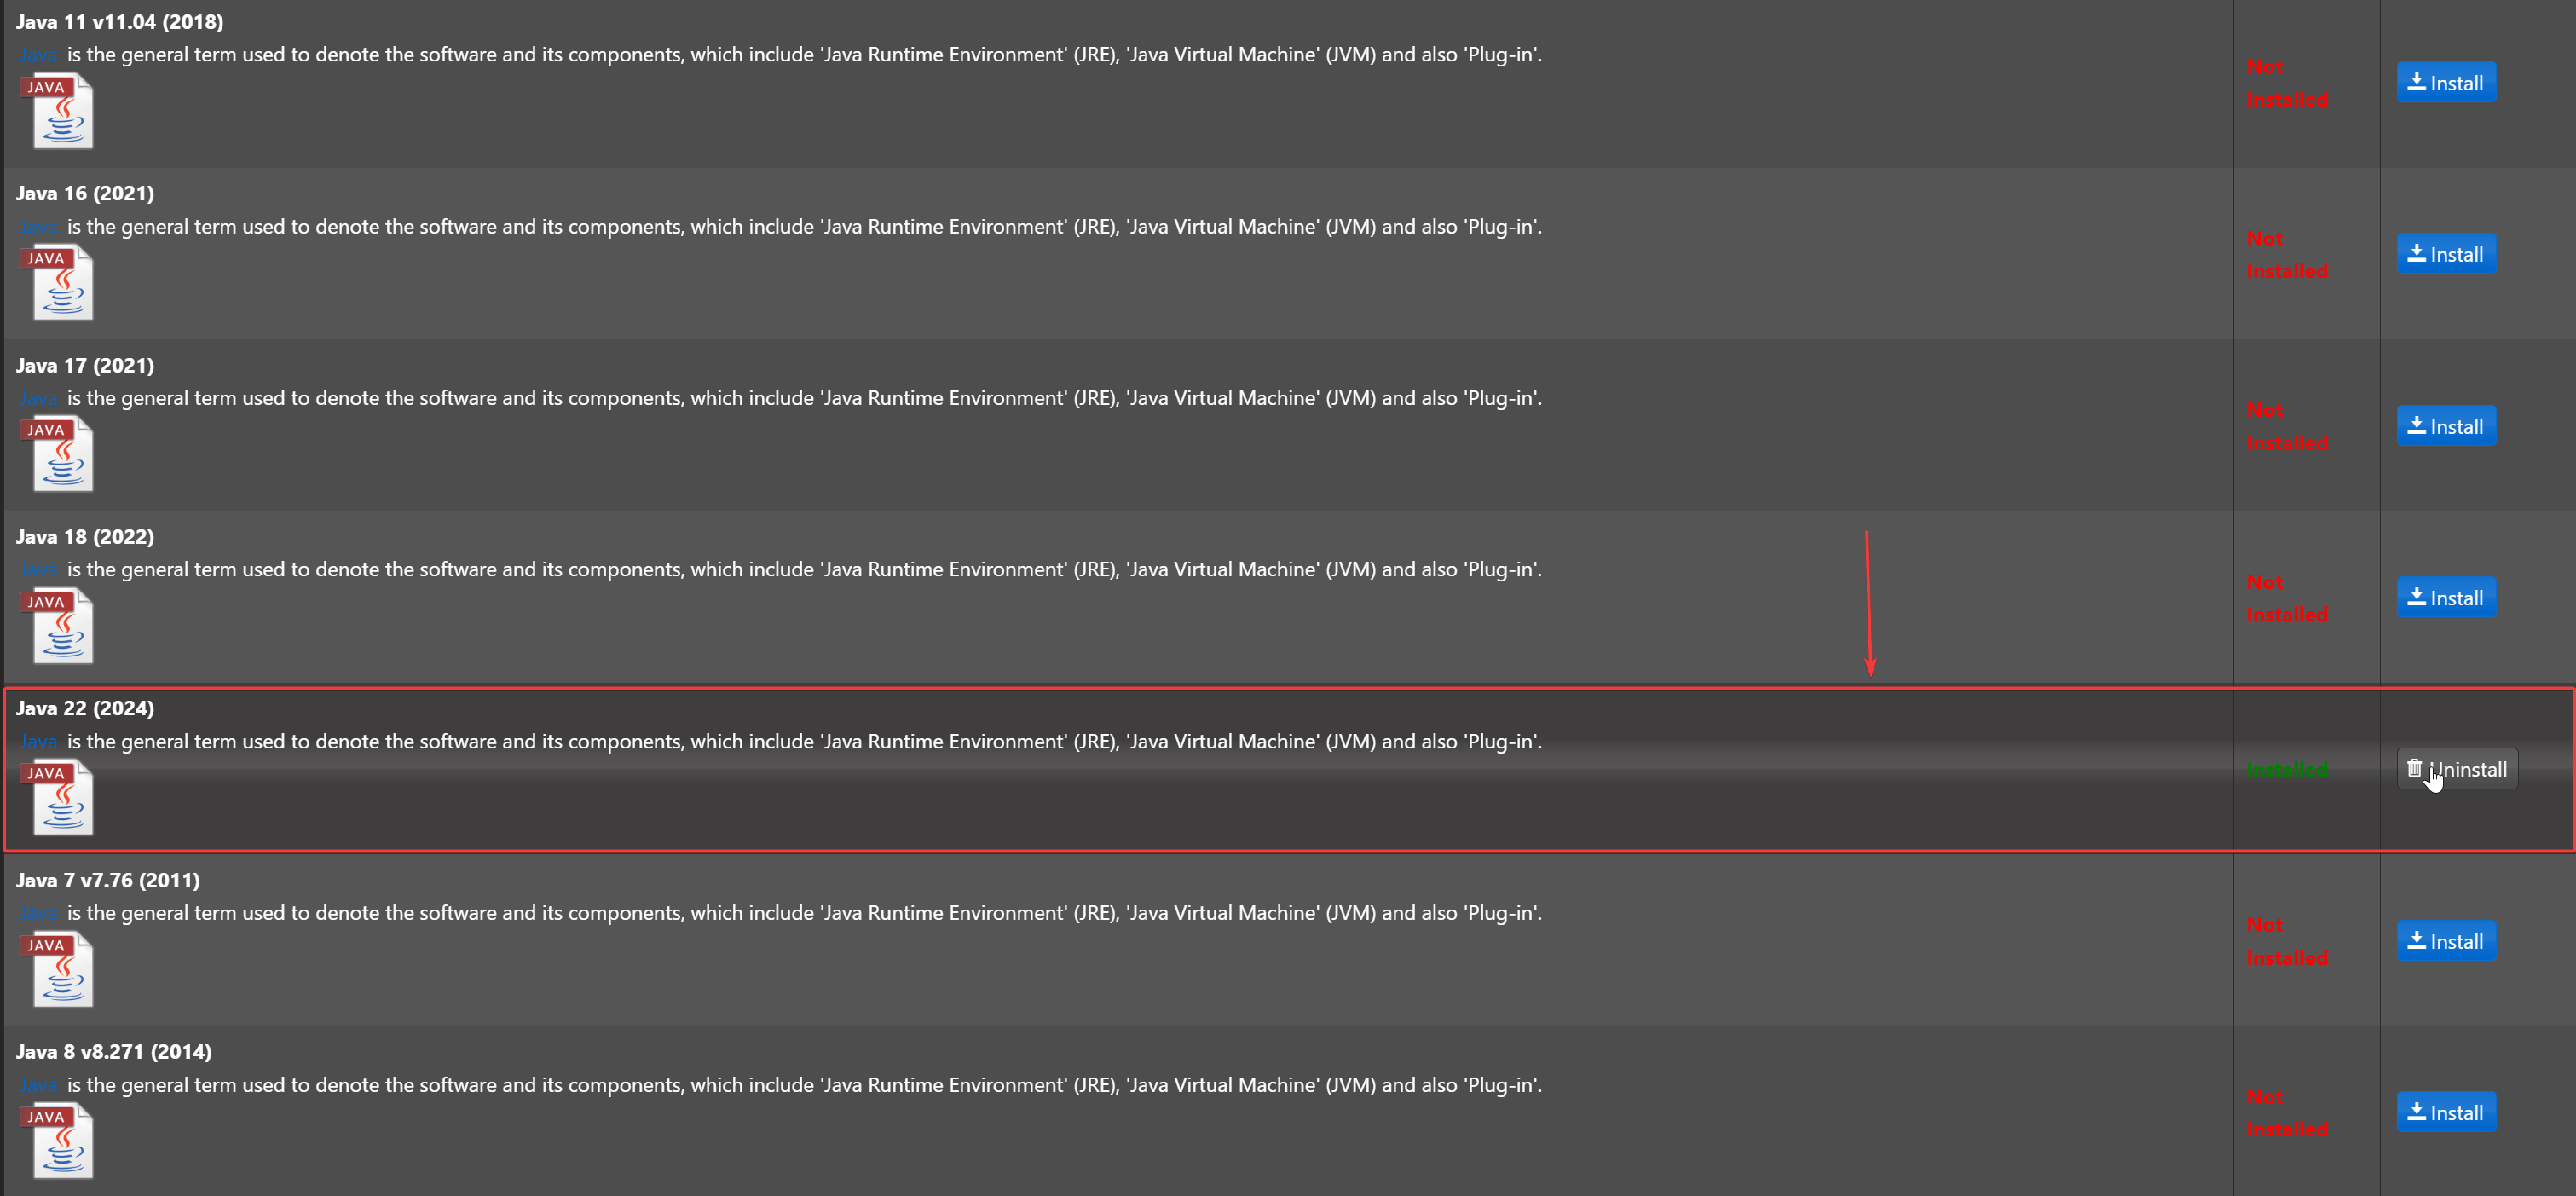
Step 1: Install the Latest Java Version
While logged into the AA Game Hosting Game Panel, navigate to the Mod Manager section.
Remove all previously installed Java versions from the Java section.
Then, install the latest available Java version.
Step 2: Select the Minecraft Version
Go to the Updates section in the left-hand menu.
Choose the latest version or your preferred version of Minecraft.

Step 3: Configure Command Line Settings
Go to the Commandline Manager in the left-hand menu.
Select the version you installed and click Modify.
In the Detected Jar Files dropdown, choose the correct version.

Step 4: Start Your Server
Return to your Game Panel homepage and click Start.
Once the server is running, open the Web Console to confirm it’s using the correct version.

Step 5: Connect to Your Server
Join your server to confirm it’s working before adding any mods or making further changes.
Click here to order your Minecraft server with AA Game Hosting today!
Did the above steps not work for you? Please contact our support and we'll help you out!
