![]()
This guide will help you with how to upload mods to your Starbound Server manually
Spin Up Your Starbound Server in Minutes Using AA Game Hosting
Manually uploading mods to your Starbound server gives you full control over what content is installed and how it’s organized. Whether you’re adding custom creations, using mods not available through automated tools, or managing a heavily customized server setup, the manual method ensures everything is placed exactly where it needs to be. This guide walks you through the process step‑by‑step so you can confidently upload, configure, and run mods on your Starbound server without relying on external managers.
Manually Installing Mods on Your Starbound Server
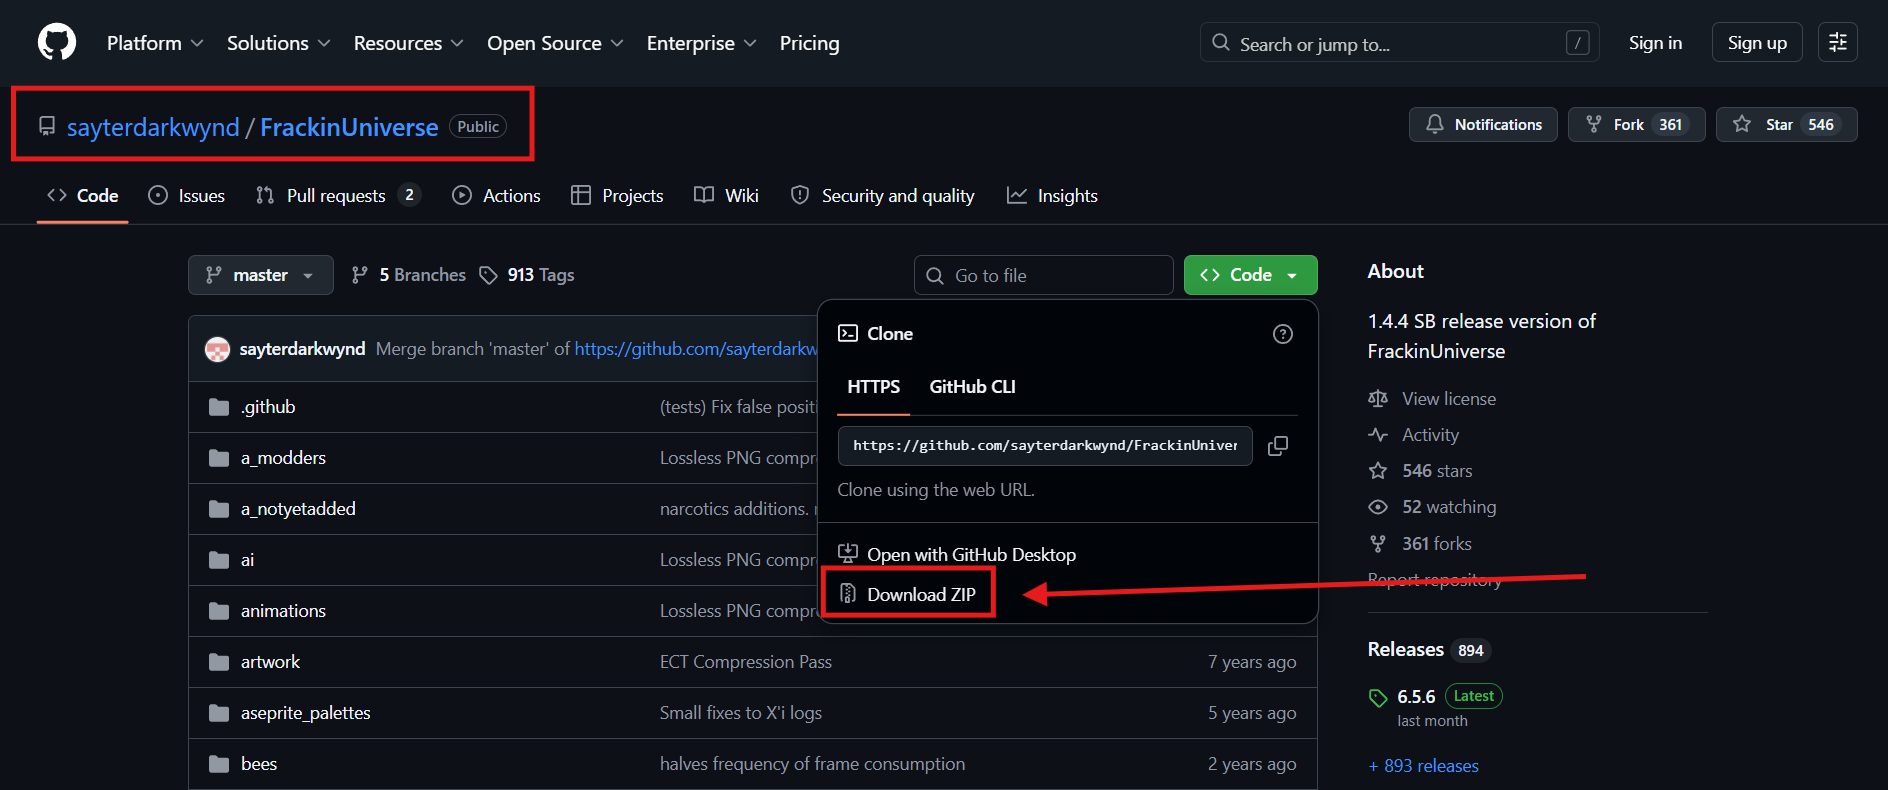
1. Head to Sayter’s GitHub repository and download the mod’s ZIP file from the releases or main page. Refer to the image below to locate the download button.
2. Locate the ZIP file you downloaded from GitHub and open the folder where it was saved.
3. Upload and extract it to the /mods directory in your file manager. To reduce the risk of corrupted files, we highly recommend using an FTP tool such as FileZilla when uploading your mods.
4. Make sure to rename the folder to FrackinUniverse. The mod will not function unless the folder name matches exactly.
5. Start the server so the mods will be installed and launched on your server.

Did the above information not work for you?
Please click here to contact our support via a ticket.
