
This guide will show you how to enable and configure a Whitelist on your Project Zomboid Server
Click here to order your Project Zomboid server with AA Game Hosting.
Running a Project Zomboid server is all about creating the experience you want, whether that’s a tight‑knit survival group, a roleplay‑focused community, or a private world for friends. Enabling a whitelist is one of the most effective ways to keep your server secure and ensure that only approved players can join. By turning off public access and manually authorizing users, you gain full control over who enters your world, helping prevent griefing, unauthorized logins, and unwanted chaos. This guide walks you through the process of enabling and configuring a whitelist on your Project Zomboid server, from adjusting your server settings to adding players safely. Whether you're hosting locally or using a game server provider, the steps below will help you lock down your server with confidence.
Setting Up a Whitelist for Your Project Zomboid Server
SETTING UP:
You just need to download SQLite Admin. We have hosted this software for this purpose from this link: Download
You should receive an sqliteadmin.zip file. Extract it to a folder of your choosing. It's a program for editing file-based SQL databases (SQLite specifically) that we'll be using to add users to our Whitelist.
ADDING USERS TO WHITELIST:
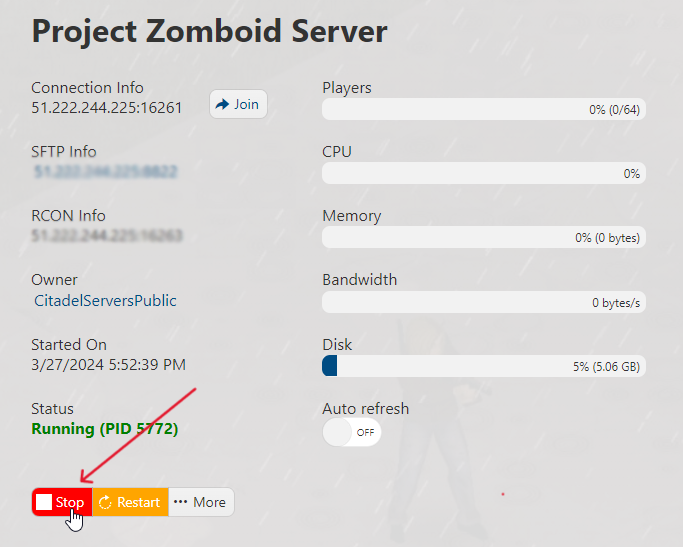
1. First and foremost, log in to the Game Panel (click this link for easy access), then go to your Game Service.
You will see if your game server is running or not. Make sure to stop your server for now by clicking on the "Stop" button.
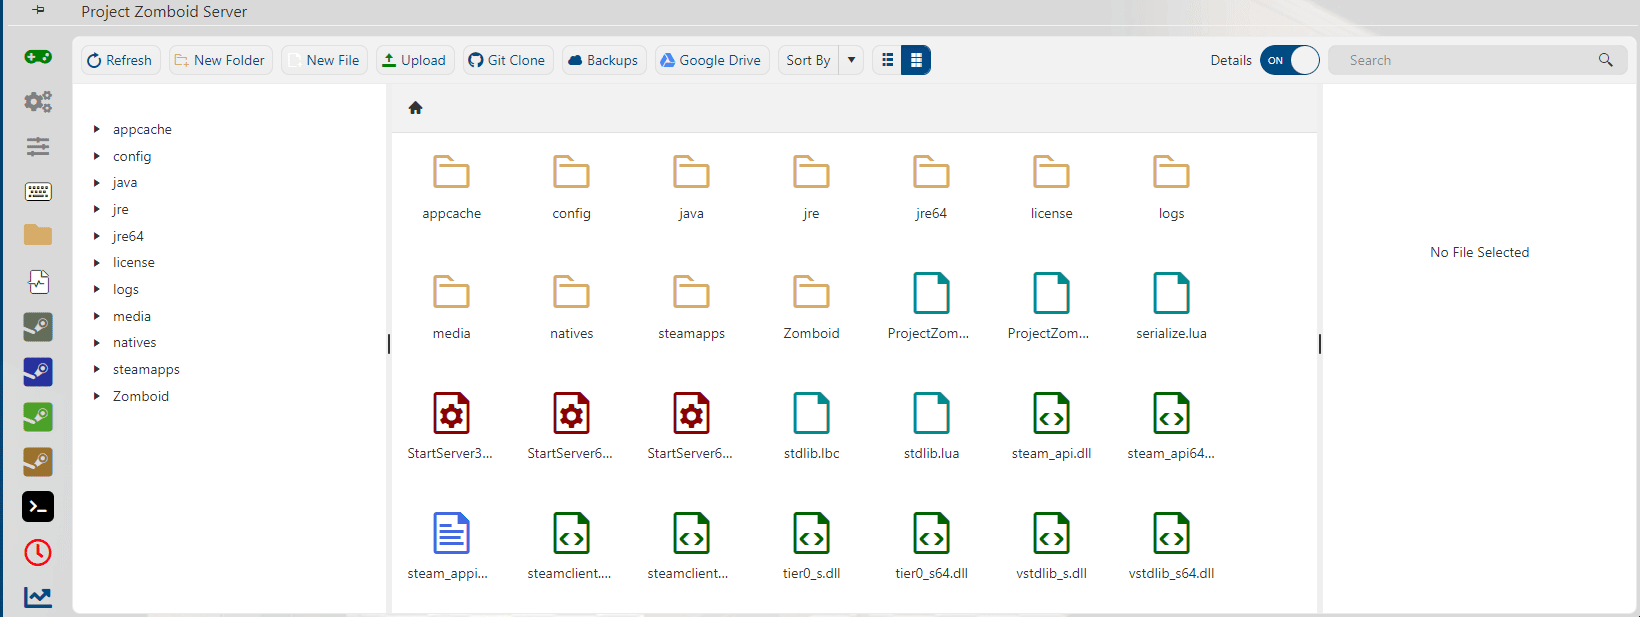
2. On the left-hand side panel, go to the File Manager section.
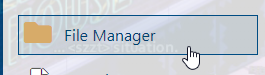
3. Navigate to Zomboid/Server/db. You should find a .db file inside that folder. Right-click on that file and press download.
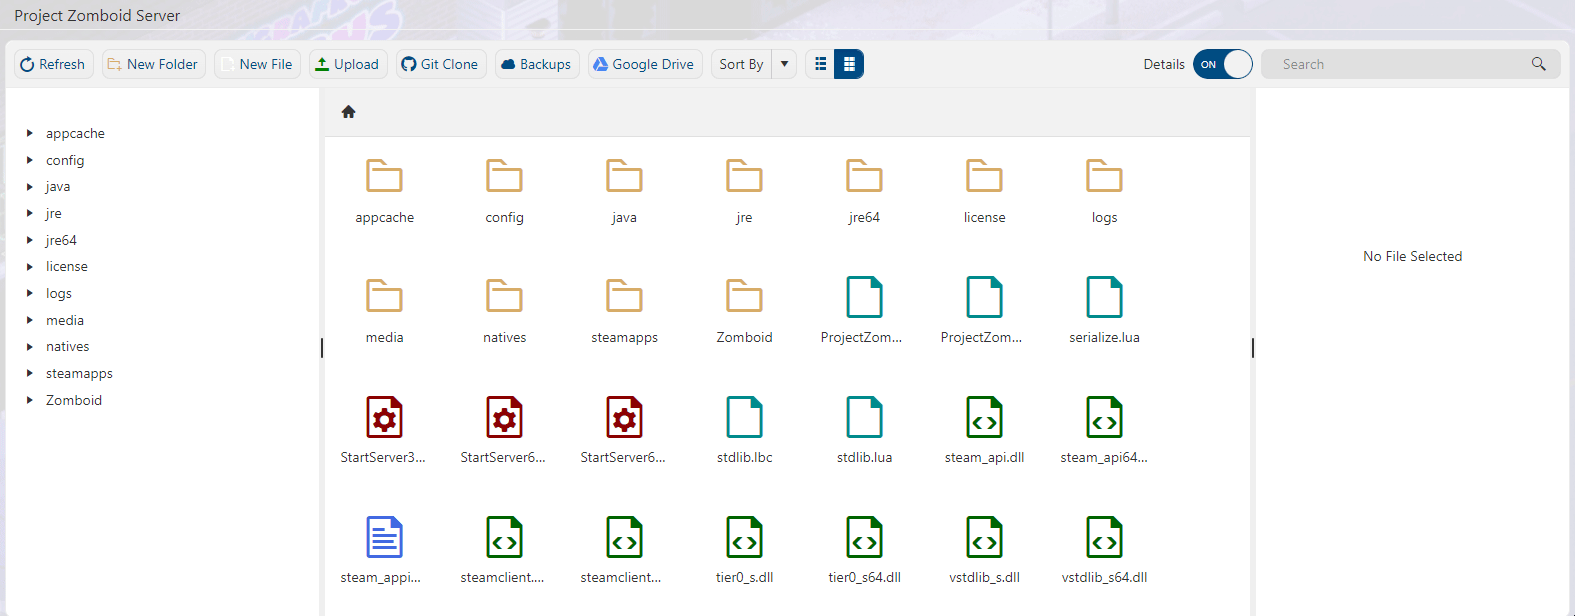
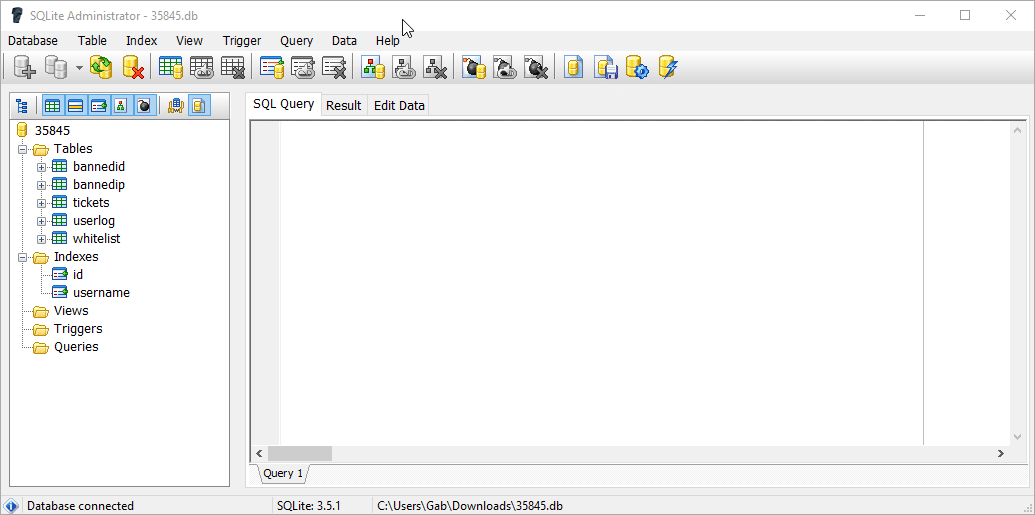
4. Navigate to where you extracted the zip file earlier. From there, open sqliteadmin.exe and go to Database>Open, Then select the .db file you downloaded from your server.
5. Navigate to Tables > whitelist > id. Press on the Edit Data, then click on the "+" button. Fill the boxes with their respective values, like ID, username, password, etc. For the column "world", input the file name of your database. In this case, it's "35845". The changes you make save automatically, so you can just close the program when you're finished adding users.
6. Now go back to your game panel's File Manager section, navigate back to Zomboid/Server/db, and upload the .db file you just edited
7. After uploading, go to the Configuration Files section on your left-hand panel.
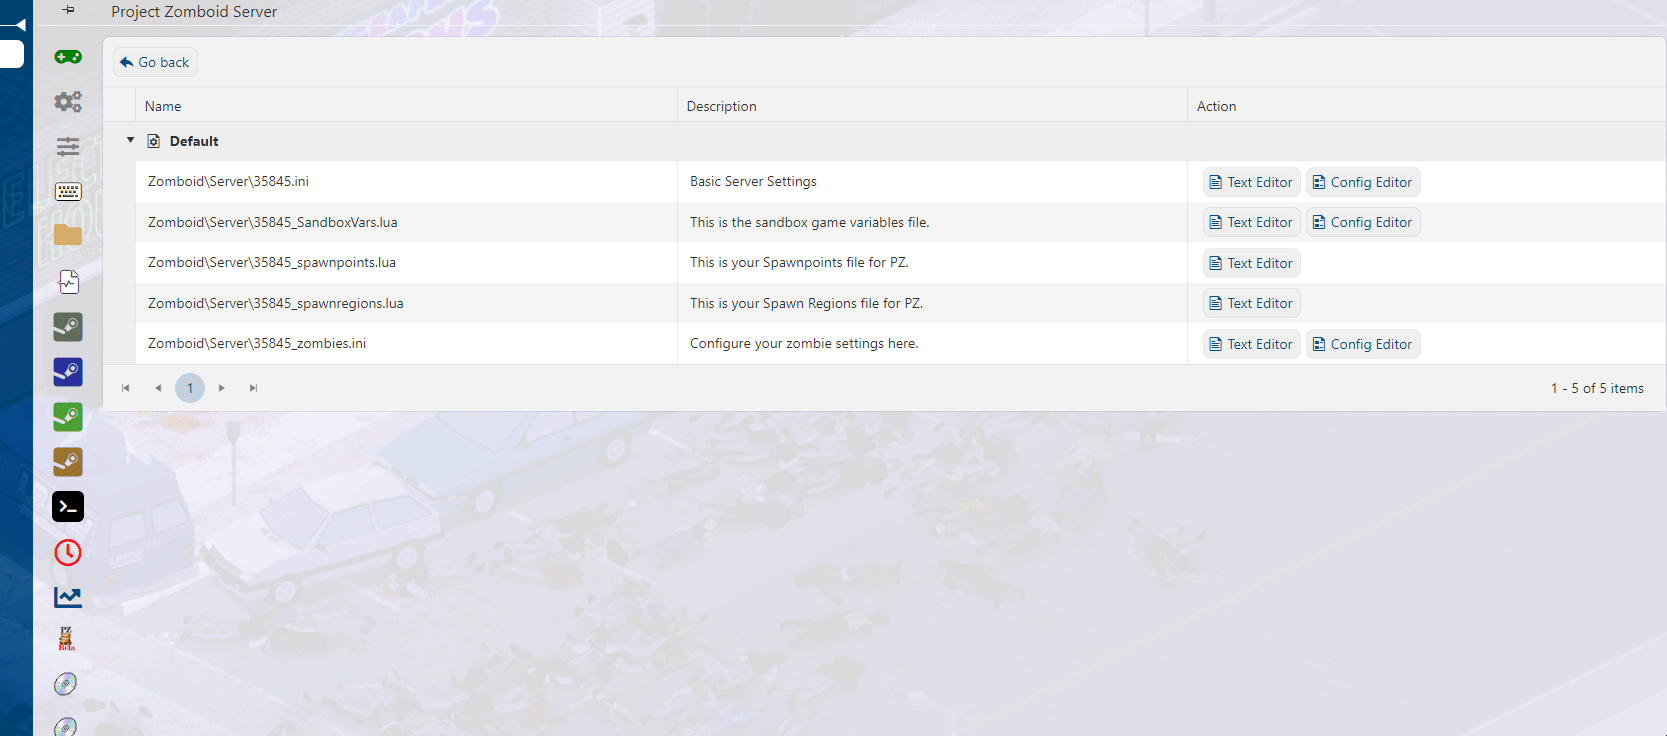
8. Click on the "Text Editor" button for the Basic Server Settings. Head to line 13 and edit the value of true to false. This prevents players from joining the server unless their credentials are added to the Whitelist. Finally, hit "Save & Exit".
9. Go back to your Game Panel to start your Project Zomboid server with Whitelist. Happy playing!
If you encountered issues during the process,
Please click here to send a ticket to our team.
