This guide will show you how to set up your Project Zomboid server.
Click here to order your Project Zomboid server with AA Game Hosting.
1. Log in to your Game Control Panel.
2. Navigate to your PZ server and then start it.
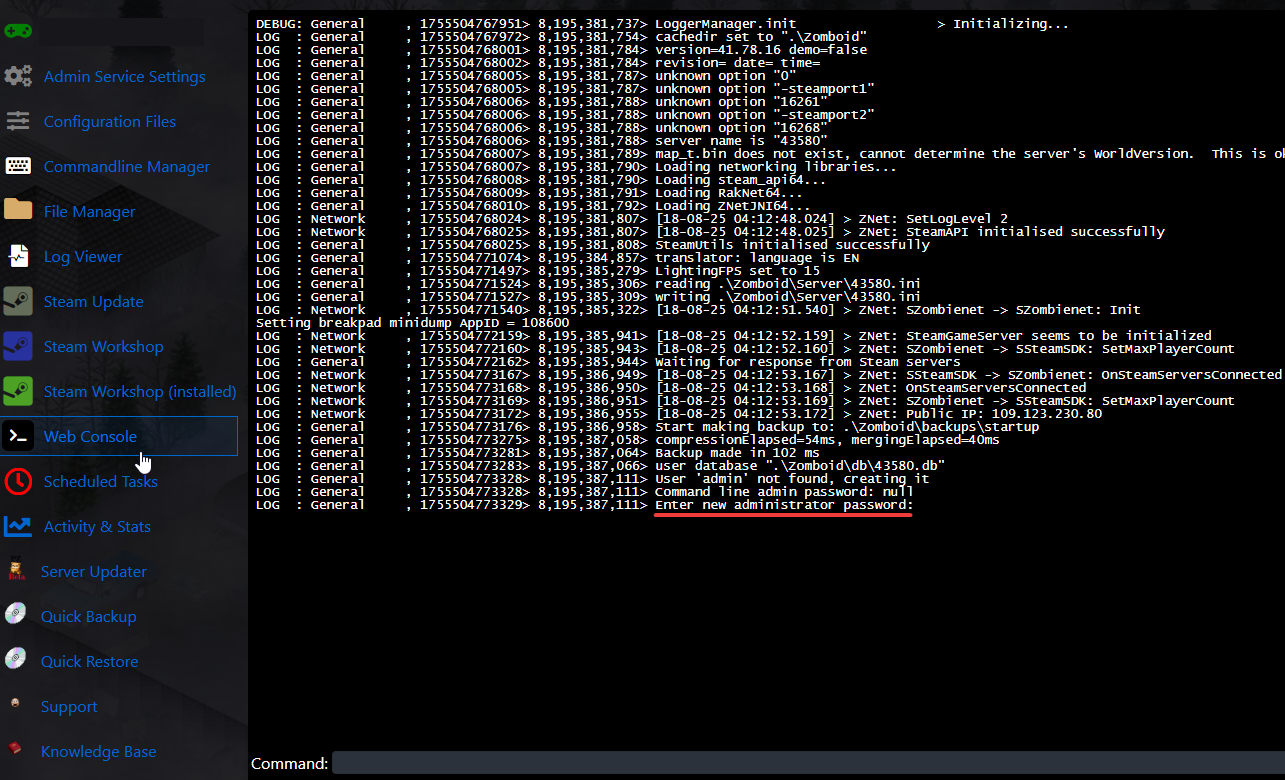
3. Once the server is started, open the Web Console. Input and confirm a new Admin password.
You can write it on the command field at the bottom of the console window, press Enter once done.
4. Once you have finished adding the password, the server will continue the setup initialization.
After doing this, the server will no longer ask for an admin password for the next start-up processes.
Once it's done processing, you can now search for and join the server.
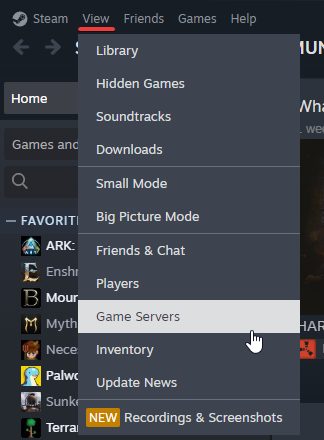
To find the server, use the Steam server list under the "View" options on the Steam client.
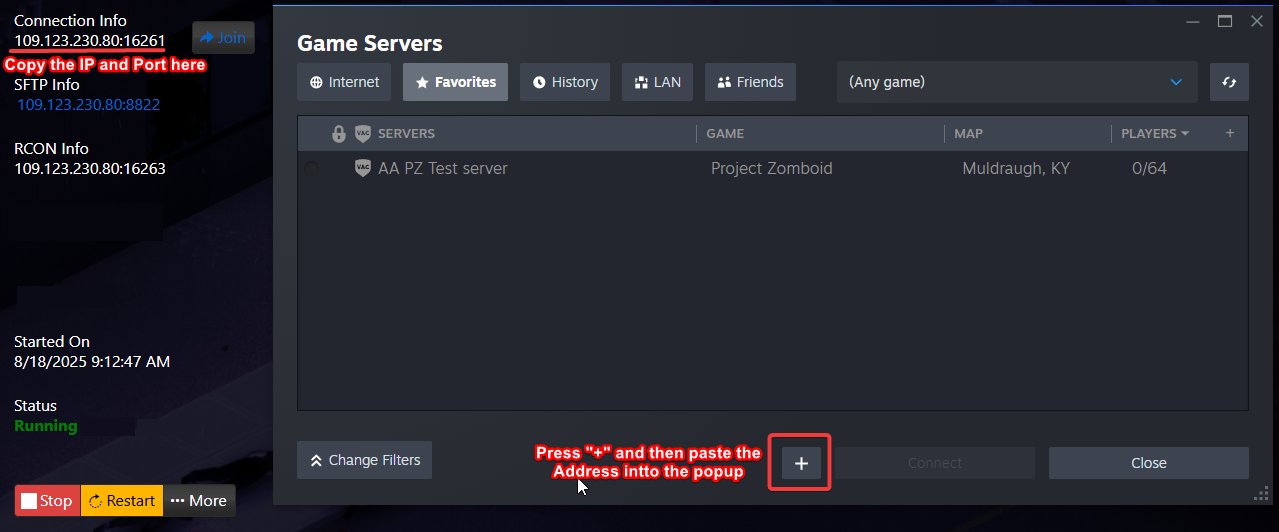
5. Once the Steam server list is open, go to your Control Panel and copy the Connection Info.
This is the IP and Port of your server, then use the "+" symbol in the Favorites tab to add it.
If you encountered issues during the process,
Please click here to send a ticket to our team.

