![]()
This guide will help you How to Create a Flat World on your Hytale Server.
Click here to order your Hytale server with AA Game Hosting today!
Creating a flat world on your Hytale server gives you a clean, empty canvas to build on, perfect for hubs, minigames, redstone‑style contraptions, or any project where terrain shouldn’t get in the way. Instead of working around mountains, caves, and biomes, you start with a perfectly level landscape that you can shape entirely on your own terms. This makes flat worlds especially useful for server owners who want full control over layout, performance, and player flow. A flat world also simplifies planning. You can design symmetrical structures, test mechanics, or build large-scale projects without worrying about uneven ground or natural obstacles. Whether you're creating a central spawn area, a creative build zone, or a custom game mode, a flat world provides the consistency and predictability you need. This guide walks you through the steps to generate and configure a flat world, explains the settings that matter most, and highlights a few design considerations that help you get the most out of your new environment.
Setting Up a Flat World in Hytale
1. Log in to your Game Control Panel and navigate to your service.
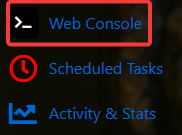
2. Navigate to the Web-Console Tab.
3. In the Web‑Console tab, execute the following command to apply the change:
/world add <name> --gen Flat

NOTE: At this point, the flat world exists but contains only a single layer of blocks, which means players may spawn in unsafe positions and fall into the void. To avoid this, administrators should set a secure spawn point by using the /spawn set command, ensuring every player appears on solid ground when joining the world.
4. Next is stop the server.
5. Navigate to the File Manager Tab.

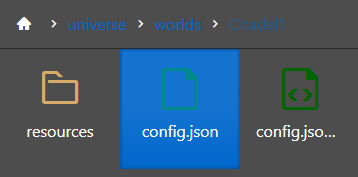
6. Follow the directory path /home/universe/worlds/(chosen world)/config.json and open the file by double‑clicking it.
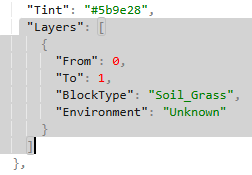
7. In the file, locate and select the "Layers": [] entry to prepare it for editing.
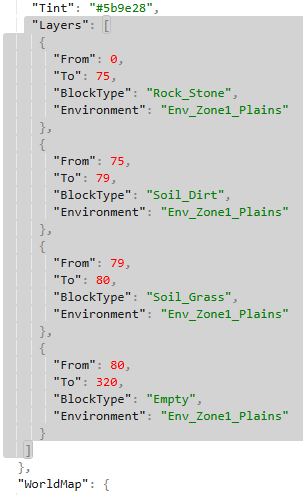
Replace the existing "Layers": [] field with the following configuration to define your flat world’s block layers:
8. After editing the configuration, click Save to apply the changes to your server and ensure the new world settings take effect.

9. Start the server, then return to the Web‑Console tab to continue with the next configuration steps.

10. Run the following command to reload the world configuration:
/worldgen reload --world <name> --clear

Did the above information not work for you?
Please click here to contact our support via a ticket.
