![]()
This quickstart guide will help you jumpstart your adventure on your Insurgency Standalone Server.
Click here to order your Insurgency Standalone server with AA Game Hosting today!
Getting started with Insurgency Standalone can feel overwhelming at first between configuring servers, managing mods, and understanding the game’s tactical mechanics, there’s a lot to take in. That’s exactly why this Quickstart Guide exists: to give you a clear, streamlined path from installation to gameplay without the confusion. Whether you’re a first-time player or a community admin preparing to host matches, this Quickstart Guide will equip you with the knowledge to dive into Insurgency confidently. By the end, you’ll have a fully functional setup and the skills to enjoy the game the way it was meant to be played fast, tactical, and immersive.
How to Connect to your Insurgency Standalone Server
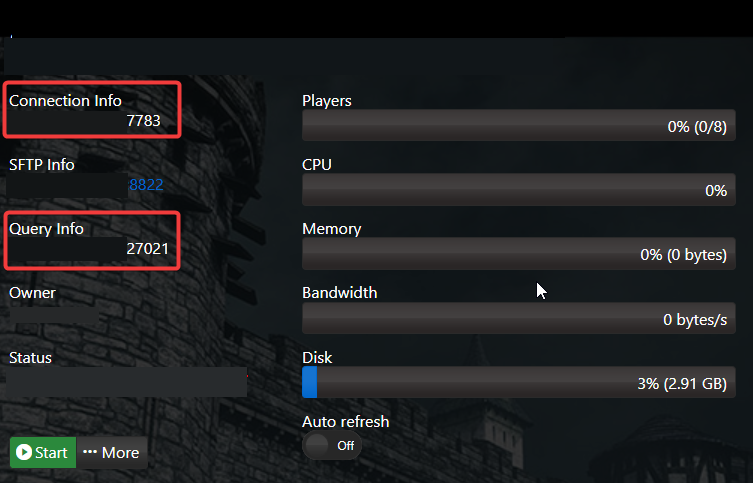
1. Log in to your Game Control Panel and navigate to your service.
2. Copy the Connection Info/Query Port listed.
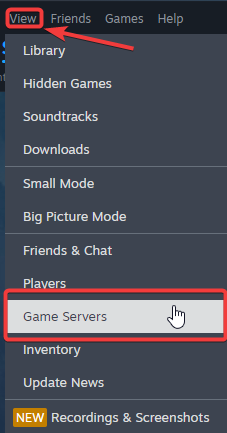
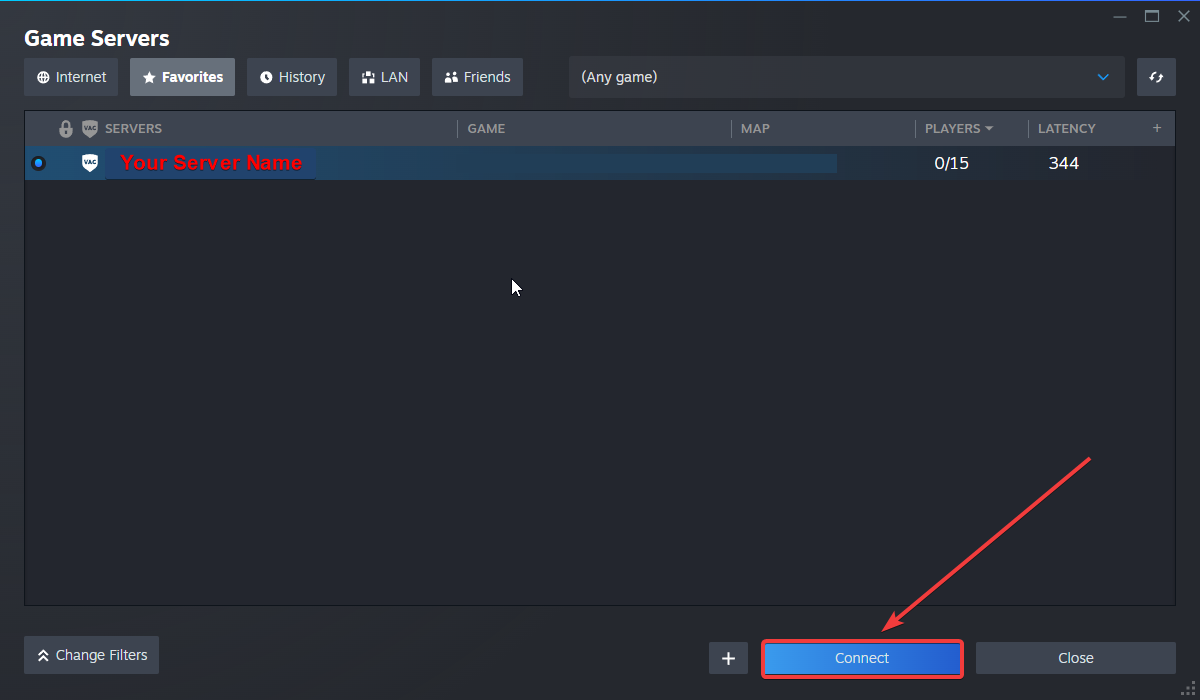
3. Open Steam. Click the View tab, then click Game Servers.
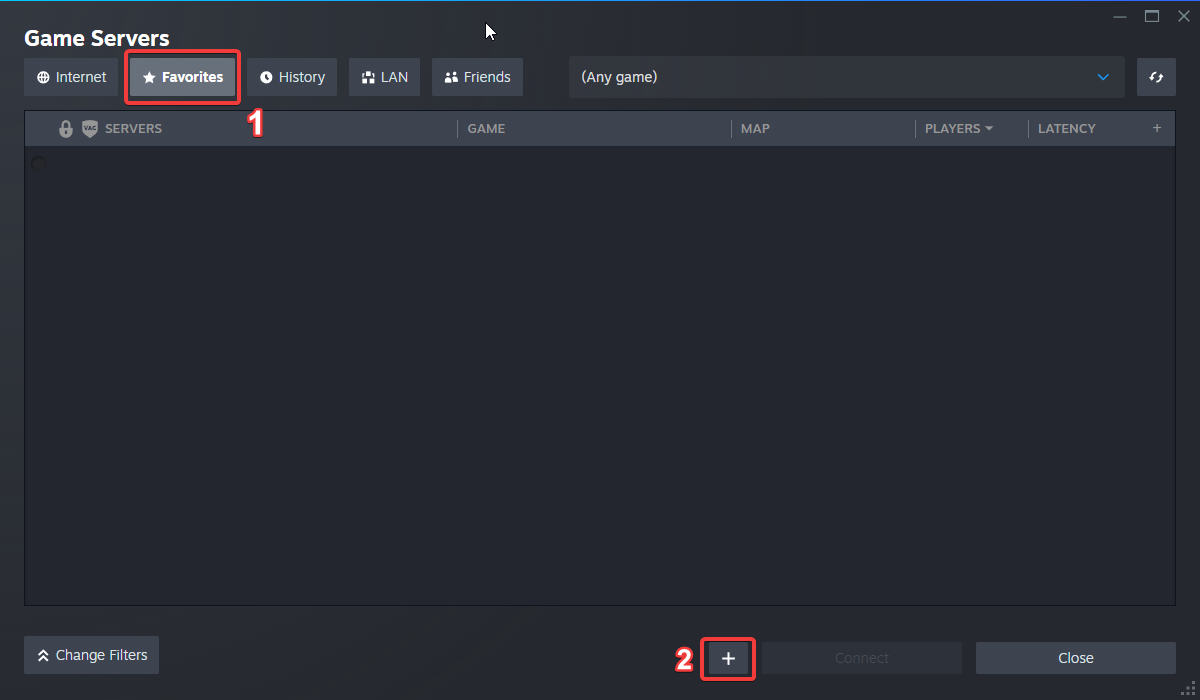
4. Click on the Favourites tab, then click the "+" sign and Add Server.
5. Paste in your server's Connection Info or Query Info IP/Port.
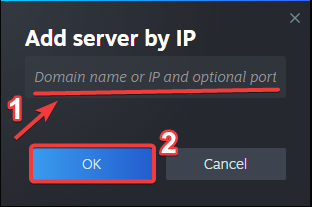
6. Click Connect.
Configuring your Server Name and Password
To edit these basic settings, follow these steps:
1. Log in to your Game Control Panel and navigate to your service.
2. Before making any modifications, stop the server from running by clicking the Stop button.

3. Go to the Configuration Files Tab.
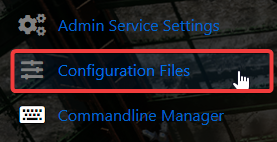
4. For the Configuration Files, select the Config Editor Button.
A pop-up will appear, and you can change the Server Name and Password.
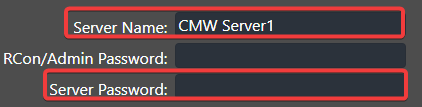
5. After editing, click Save to apply the changes.
![]()
Did the above information not work for you?
Please click here to contact our support via a ticket.
