![]()
This guide will show you how to install and setup custom maps on your Day of Defeat Source Server.
Click here to order your Day of Defeat: Source server with AA Game Hosting today!
Custom maps are a fantastic way to breathe new life into your Day of Defeat: Source server, offering fresh environments, unique gameplay experiences, and endless replayability. Whether you're looking to host competitive matches, explore fan-made battlegrounds, or simply add variety for your community, installing custom maps is a straightforward process that can greatly enhance your server. This guide will walk you through the essential steps from downloading and uploading map files to configuring your server to recognize and rotate them properly. No advanced technical skills required just a few tools and a bit of setup, and you'll be ready to deploy new battlefields in no time.
Installing and Setting up Custom Maps on your Day of Defeat Source Server
1. Log in to your Game Control Panel and navigate to your service.
2. Before making any modifications, stop the server from running by clicking the Stop button.

3. Upload the .bsp map files to the dod/maps folder using FTP like Filezilla.
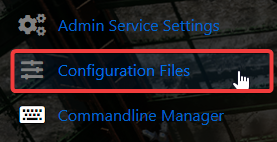
4. Go to the Configuration Files Tab.
5. For the Configuration Files, look for mapcycle.txt file and select the Text Editor Button.
6. Add each map’s file name (without the .bsp extension) on a new line.
7. If you want to include default maps along with your custom ones, simply add their names to the list as follows:
dod_argentan
dod_avalanche
dod_flash
dod_donner
dod_anzio
dod_kalt
dod_jagd
dod_colmar
dod_palermo
8. After editing, click the Save button to apply the changes.
![]()
Did the above information not work for you?
Please click here to contact our support via a ticket.
