This guide will show you how to add admins on your Day of Defeat Source Server.
Click here to order your Day of Defeat: Source server with AA Game Hosting today!
Managing a Day of Defeat: Source server effectively requires the right tools and the right people. Assigning admin privileges allows trusted players to moderate gameplay, enforce rules, and maintain a smooth multiplayer experience. Whether you're hosting a public server or a private clan match, setting up admin access is essential for maintaining order and enhancing player engagement. This guide will walk you through the process of adding admins to your Day of Defeat: Source server using SourceMod, a powerful administrative plugin. You'll learn how to configure admin permissions, assign roles using SteamIDs, and activate in-game admin menus for real-time control.
Adding Admins on your Day of Defeat Source Server
1. Log in to your Game Control Panel and navigate to your service.
2. Before making any modifications, stop the server from running by clicking the Stop button.

3. From your game panel, install both SourceMod and MetaMod. These are required to enable admin functionality on your server.
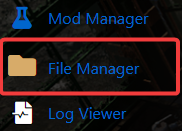
4. Open the File Manager.

5. Navigate to:dod/addons/sourcemod/configs/admins_simple.ini
6. Open the file and add admin entries in the following format:
For e.g.
Replace the SteamID with the player’s actual SteamID64. You can find it using Steamid.io.
"99:z" grants full admin permissions. You can assign specific flags instead—refer to admin_levels.cfg for available flags.
7. After editing, click the Save button to apply the changes.
![]()
8. After saving changes to admins_simple.ini, restart your server to apply the new admin settings.
Did the above information not work for you?
Please click here to contact our support via a ticket.

