![]()
This guide will show how to change the weather and add snow on your DayZ server.
Click here to order your DayZ server with AA Game Hosting today!
Creating a unique and immersive atmosphere in your DayZ server can dramatically enhance the player experience. One of the most impactful ways to achieve this is by customizing the in-game weather from dynamic storms to serene snowfall. Whether you're aiming for a harsh winter survival theme or simply want to add seasonal flair, modifying weather settings allows you to tailor the environment to your vision. In this guide, we'll walk you through the steps to change the weather and introduce snow effects on your DayZ server. You'll learn how to access and configure the necessary files, apply weather presets, and ensure your changes are reflected in-game. Let's transform your server into a winter wonderland!
Changing the Weather and Add Snow on your DayZ Server
There are several ways of adjusting behaviour of the weather within DayZ.
1. Modding script weather state machine (overriding WorldData::WeatherOnBeforeChange method, see 4_World\Classes\Worlds\Enoch.c for example).
2. Calling MissionWeather( true ) on weather object in the mission init.c ( main() ) and then using selected Weather API calls (see 3_Game\Weather.c for extensive documentation).
3. Using cfgweather.xml file in the mission folder (or world files).
Using cfgweather XML file
1. Log in to your Game Control Panel and navigate to your service.
2. Before making any modifications, stop the server from running by clicking the Stop button.

3. Go to File Manager.
4. On the File Manager, go to /mpmissions/<your preferred map> and look for cfgweather.xml file then select Edit.
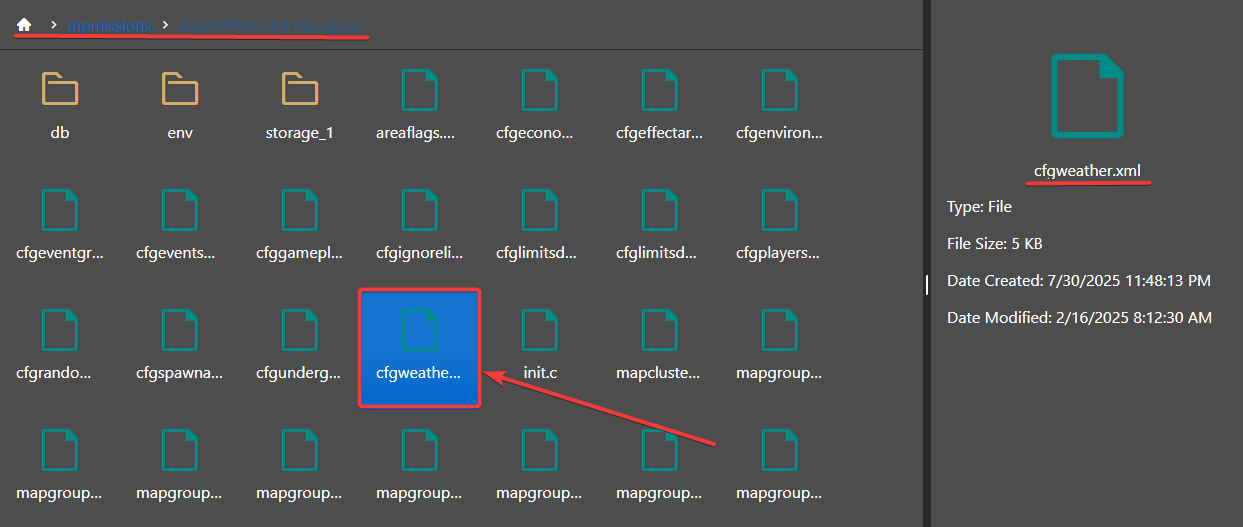
5. Following example shows a full (and later partial) cfgweather XML file alongside with the description of each parameters. All of these parameters do reflect the Weather script API, which can be found in 3_Game\Weather.c.
<?xml version="1.0" encoding="UTF-8" standalone="yes" ?>
<!-- 'reset' and 'enable' are a bool, and therefore supports: 0/1, true/false, yes/no -->
<!-- 'reset' controls whether you want to load in the weather from storage or not (false by default) -->
<!-- 'enable' controls whether this file is enabled or not (true by default) -->
<weather reset="0" enable="1">
<overcast>
<!-- Initial conditions of the overcast (target value, time to change, how long will it stay) -->
<current actual="0.45" time="120" duration="240" />
<!-- What is the range of the overcast value (0..1) --> <limits min="0.0" max="1.0" />
<!-- How long does it take to the overcast to change from one value to other (time in seconds) --> <timelimits min="900" max="1800" />
<!-- How much should the overcast change (0..1) -->
<changelimits min="0.0" max="1.0" />
</overcast>
<fog>
<!-- Initial conditions of the fog (target value, time to change, how long will it stay) -->
<current actual="0.1" time="120" duration="240" />
<!-- What is the range of the fog value (0..1) -->
<limits min="0.0" max="1.0" />
<!-- How long does it take to the fog to change from one value to other (time in seconds) -->
<timelimits min="900" max="1800" /> <!-- How much should the fog change (0..1) -->
<changelimits min="0.0" max="1.0" />
</fog>
<rain>
<!-- Initial conditions of the rain (target value, time to change, how long will it stay), restricted by thresholds (see below) -->
<current actual="0.0" time="120" duration="240" />
<!-- What is the range of the rain value (0..1) -->
<limits min="0.0" max="1.0" />
<!-- How long does it take to the rain to change from one value to other (time in seconds) -->
<timelimits min="300" max="600" />
<!-- How much should the rain change (0..1) -->
<changelimits min="0.0" max="1.0" />
<!-- What range of the overcast value allows the rain to be preset (min, max overcast value, time in seconds it takes for rain to stop if the overcast is outside of the specified range) -->
<thresholds min="0.5" max="1.0" end="120" />
</rain>
<wind>
<!-- Maximum wind speed (in m/s) -->
<maxspeed>20</maxspeed>
<!-- Min and max (relative 0..1) for the wind speed range, frequency of the wind changes -->
<params min="0.0" max="1.0" frequency="30" />
</wind>
<!-- Lightning density (0..1), threshold for the lightning appearance (tied to the overcast value, 0..1), time (seconds) between the lightning strikes -->
<storm density="1.0" threshold="0.7" timeout="25"/>
</weather>
6. After Editing, click the Save button to apply the changes on your server.
![]()
7. On the same directory, look for cfggameplay.json file and click Edit.
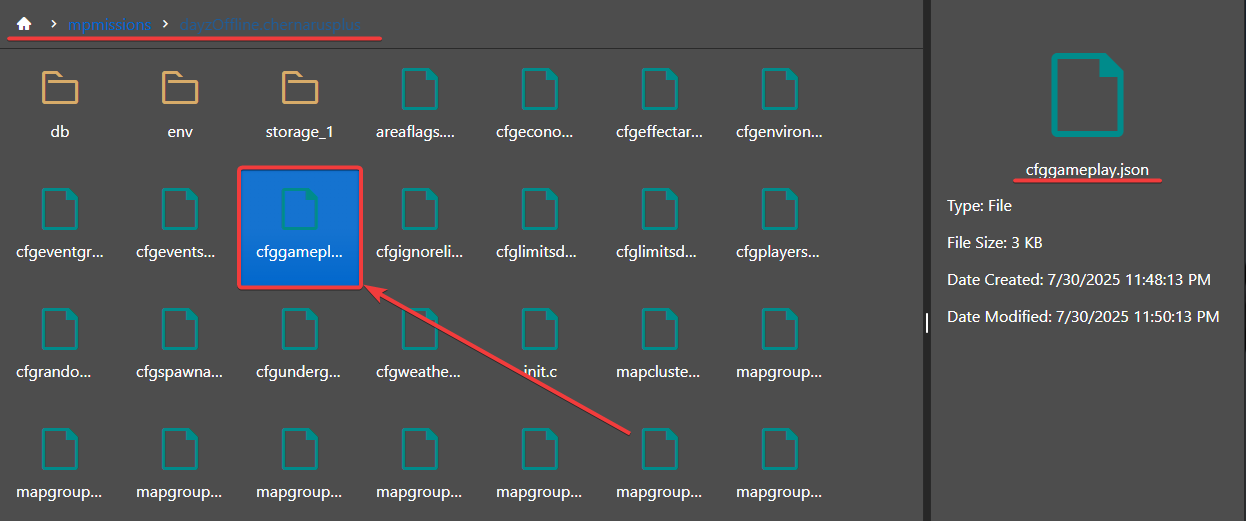
8. In this file you will find various world settings, if you want to change the average temperatures of the world you can do so here.
Here's an example to make the world permanently cold, resulting in a more snow like world, which would resemble northern Canada, northern Sweden etc.
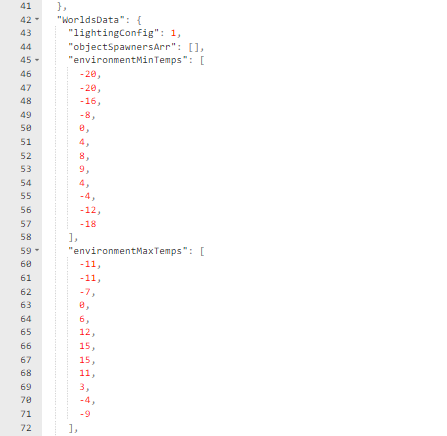
Snowy world parameters:
"environmentMinTemps": [-20, -20, -16, -8, 0, 4, 8, 9, 4, -4, -12, -18],
"environmentMaxTemps": [-11, -11, -7, 0, 6, 12, 15, 15, 11, 3, -4, -9]
9. After editing, click the Save button to apply the changes on your server.
Start your server and enjoy your adventure in the snowy maps of your Day Z server.
Did the above information not work for you?
Please click here to contact our support via a ticket.
