
This guide will show you how to switch to isle of siptah map on your Conan Exiles server.
Click here to order your Conan Exiles server with AA Game Hosting.
Ready to leave the Exiled Lands behind and explore the storm-swept mysteries of the Isle of Siptah? Whether you're craving new dungeons, powerful surges, or a fresh survival challenge, switching your Conan Exiles server to the Isle of Siptah map is the perfect way to shake things up. This quick guide will walk you through the steps to make the transition smooth and hassle-free so you and your clan can dive into the chaos without missing a beat.
Switching to Isle of Siptah Map on your Conan Exiles Server
1. Login to your Game Panel.
2. Before making changes, make sure the server is stopped.

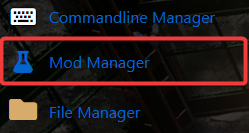
3. Navigate to Mod Manager.
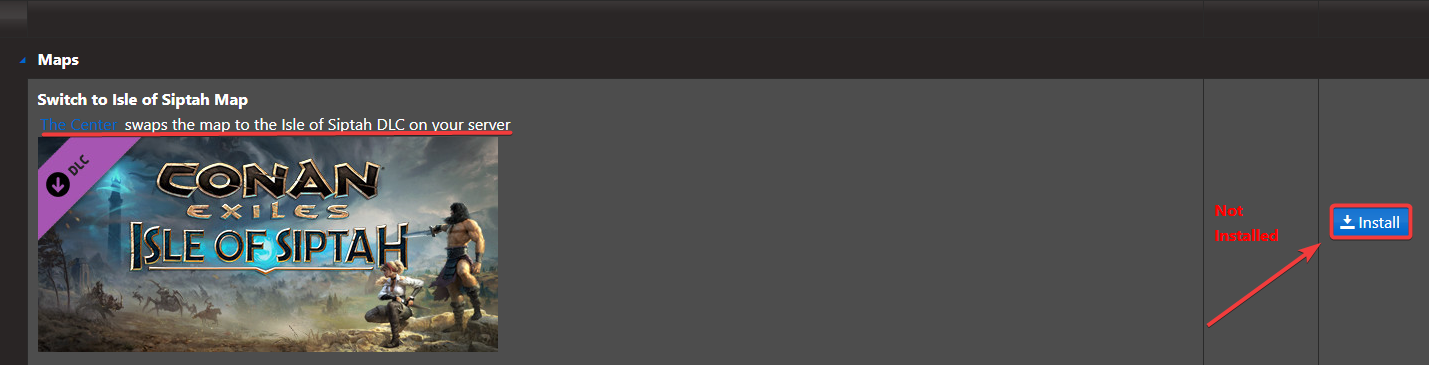
4. Install the Isle of Siptah Map.
5. Once installed, Go to the Commandline Manager and click Modify on the activated commandline.

6. After editing, click the Apply button to save the changes.

7. Next is go to Configuration files, look for Engine.ini file and click the Text Editor. 
8. On the Text Editor, Add the following scripts:
[/Script/EngineSettings.GameMapsSettings]
ServerDefaultMap=/Game/DLC_EXT/DLC_Siptah/Maps/DLC_Isle_of_Siptah
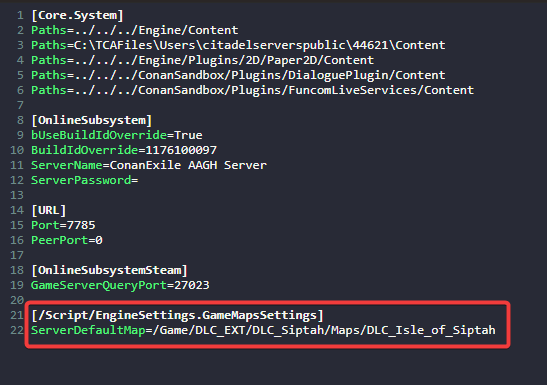
9. After editing, click the Save button to apply the changes.
![]()
Start the server and enjoy your adventure in the Isle of Siptah Map.
Did the above information not work for you?
Please click here to contact our support via a ticket.
