
This quickstart guide will help you jumpstart your adventure on your Conan Exiles server.
Click here to order your Conan Exiles server with AA Game Hosting.
Ready to carve your legend in the brutal world of Conan Exiles? Whether you're building towering fortresses, battling ancient beasts, or forging alliances in the Exiled Lands, it all starts with a solid server setup. This quick start guide will walk you through everything you need to launch your own Conan Exiles server fast, smooth, and battle-ready. No guesswork, no wasted time just pure survival.
Changing your Server Name and Password on your Conan Exiles Server
1. Login to your Game Panel.
2. Before making changes, make sure the server is stopped.

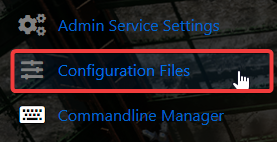
3. Navigate to Configuration Files.
4. On the Configuration Files, look for engine.ini file and click the Config Editor.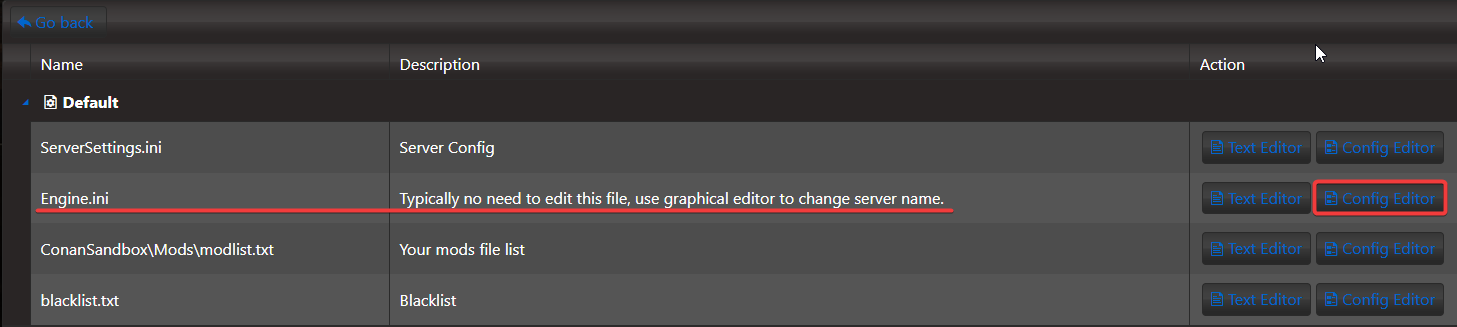
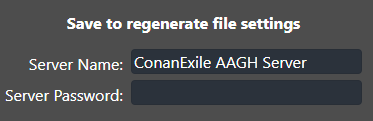
5. On the Config Editor, configure the Server Name & Password on your preferences.
6. After editing, click the Save button to apply the changes.

How to connect on your Conan Exiles Server
Follow these quick steps to connect to your server with ease:
1. Log in to your Game Control Panel and navigate to your service.
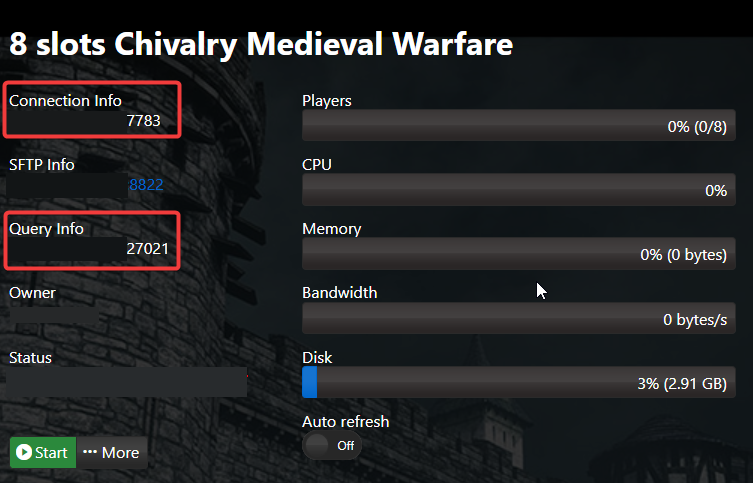
2. Copy the Connection Info/Query Port listed.
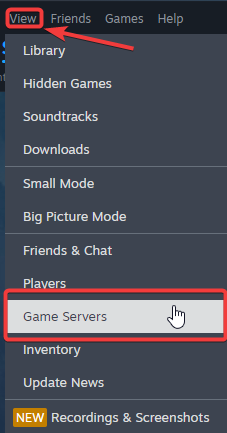
3. Open Steam. Click the View tab, then click Game Servers.
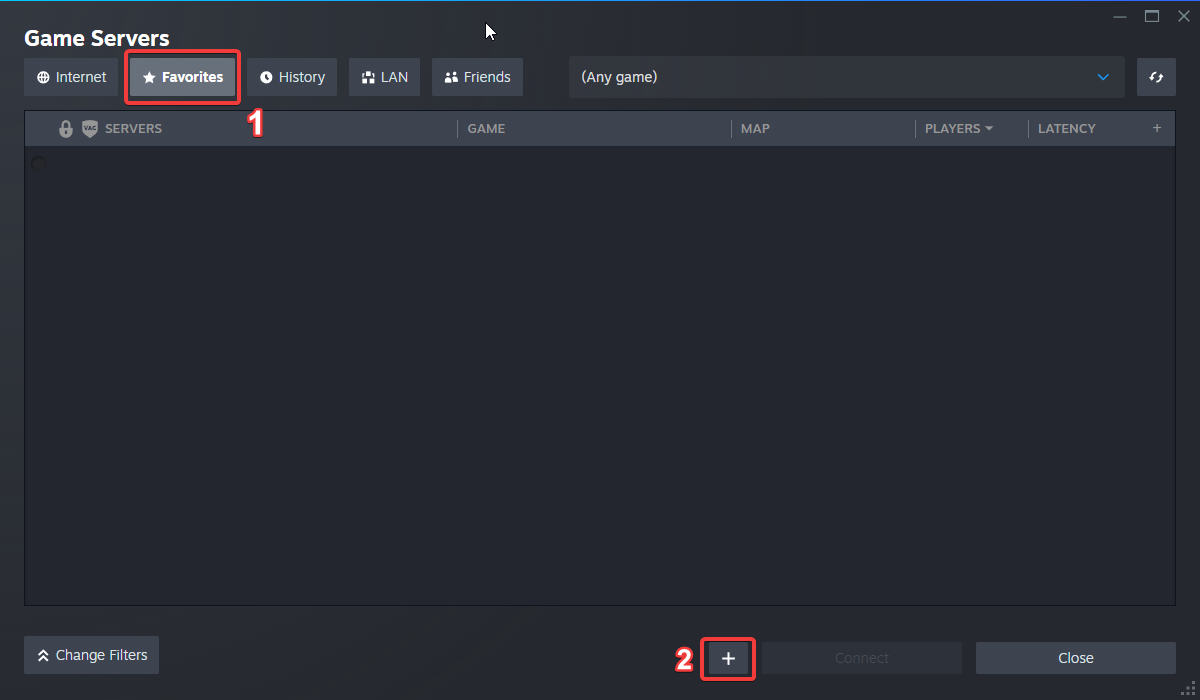
4. Click on the Favourites tab, then click "+" sign and Add Server.
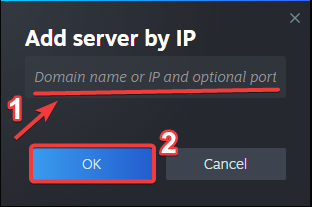
5. Paste in your server's Connection Info or Query Info IP/Port.
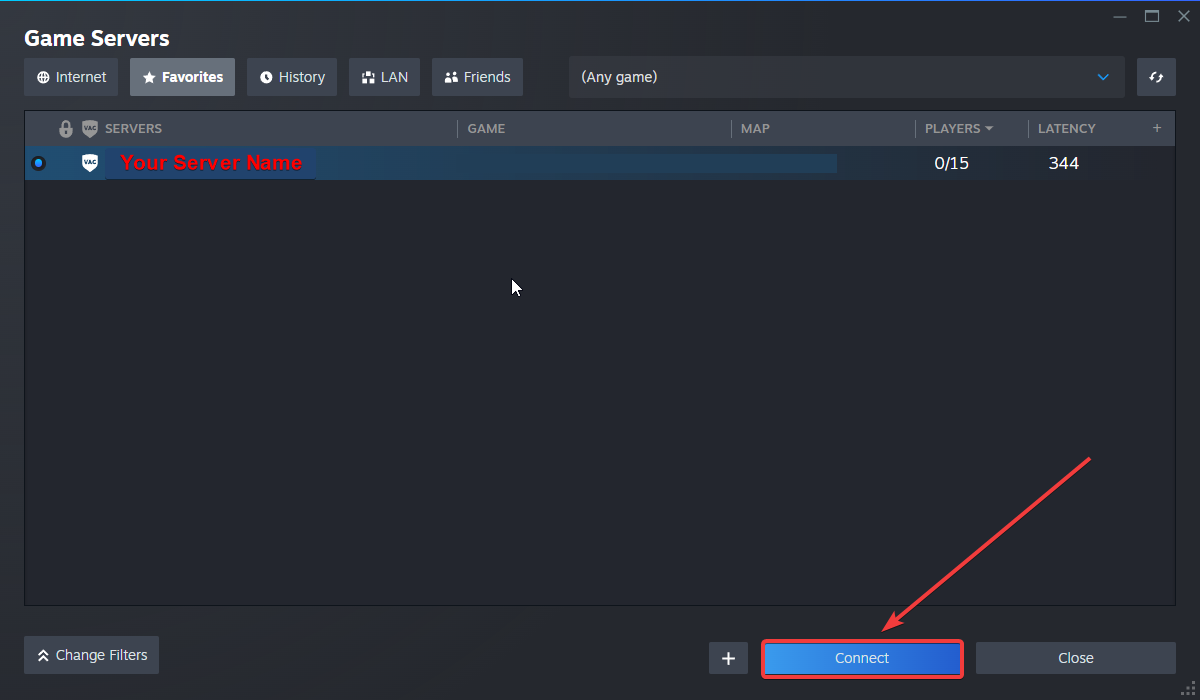
6. Click Connect.
Did the above information not work for you?
Please click here to contact our support via a ticket.
