This guide will show you how to add mods to your Barotrauma server.
Click here to order your Barotrauma server from AA Game Hosting today!
Kindly follow these updated steps to install mods on your Barotrauma server:
1. Log in to your Game Panel
Stop the server before adding mods.
2. Open Steam Workshop for Barotrauma and choose the Mods you want to install.
Once you've chosen, click on the + Subscribe button.
For this guide, I will be installing Halo Weapons (UNSC).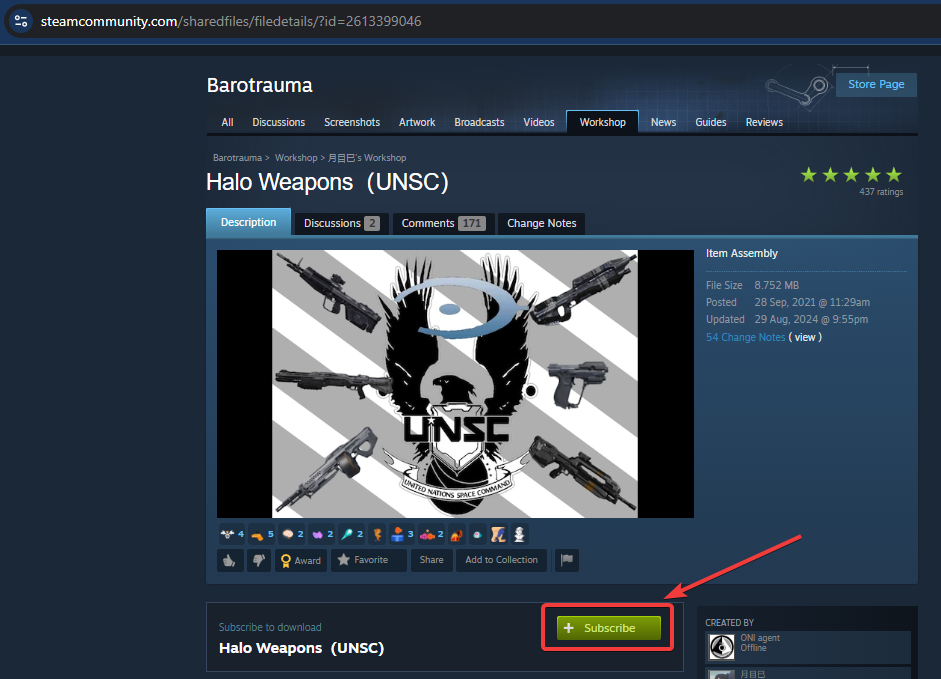
3. Transfer Mods to the Server.
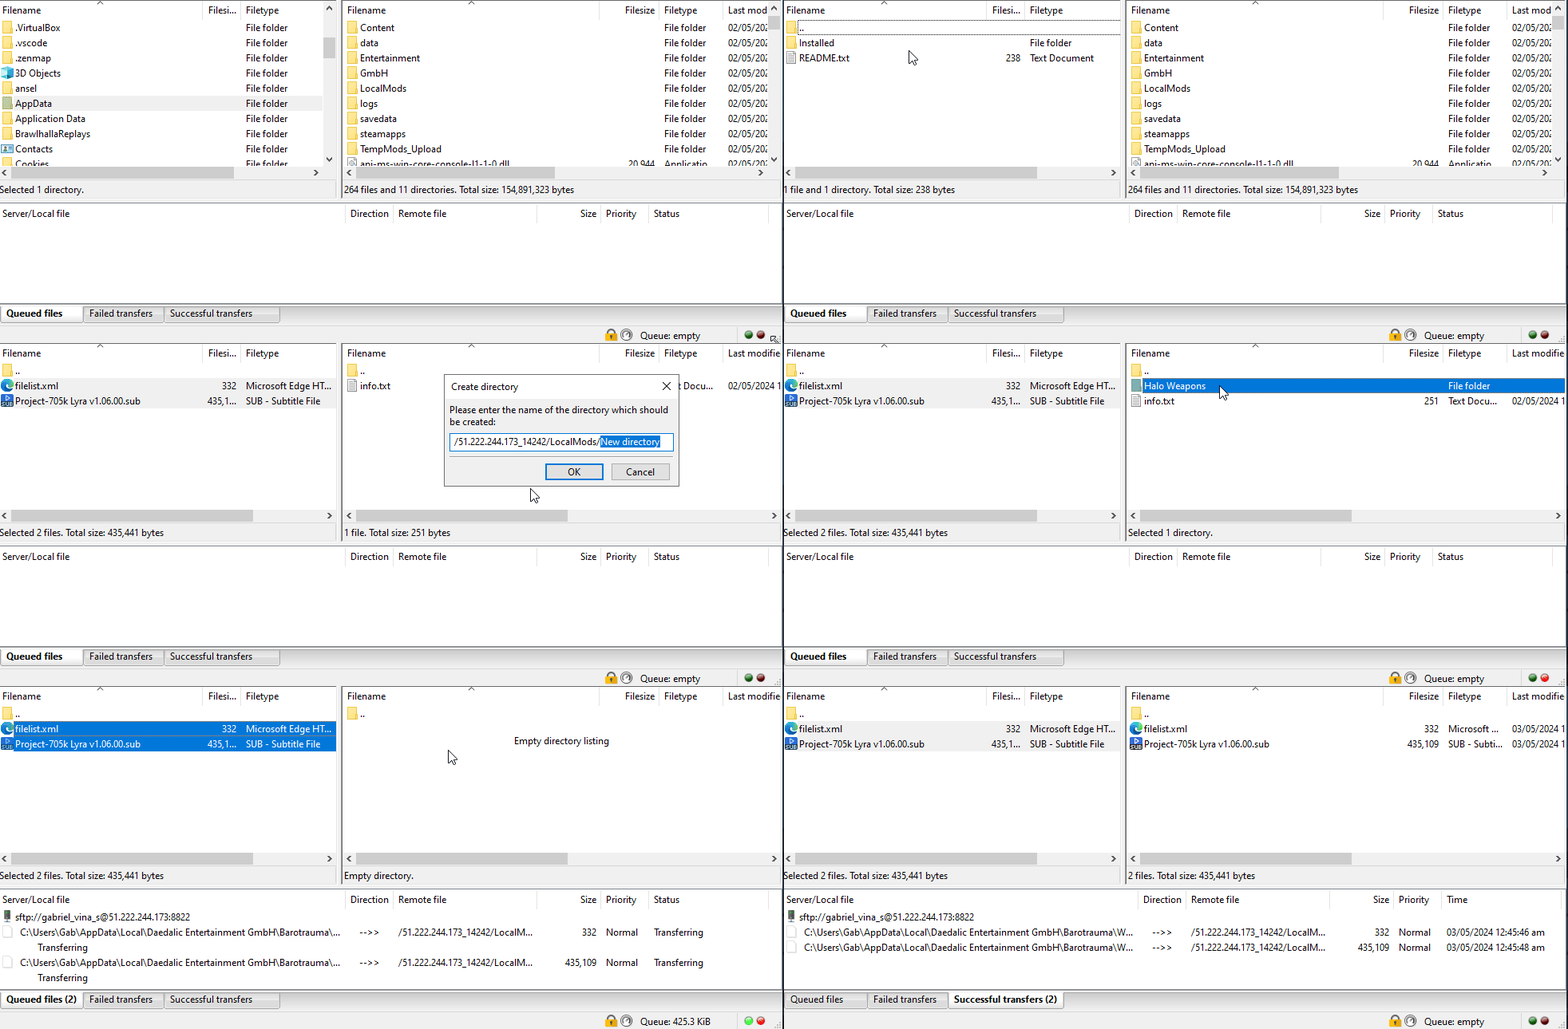
Connect to your server via FTP (Follow this guide if you're unsure how).
Once connected, open the LocalMods directory and create a new folder named after the mod you’re installing, for example, Halo Weapons.
4. Copy Mods from Your Computer.
On your computer, go to: %LocalAppData%/Daedalic Entertainment GmbH/Barotrauma/WorkshopMods/Installed
Locate the mod you subscribed to, then drag and drop its files into the new folder you created on the server.
5. Alternative Method
Instead of copying mods one by one, you can transfer all Workshop mod folders from your computer to the server’s LocalMods directory at once. These folders are named with a 10-digit numeric ID.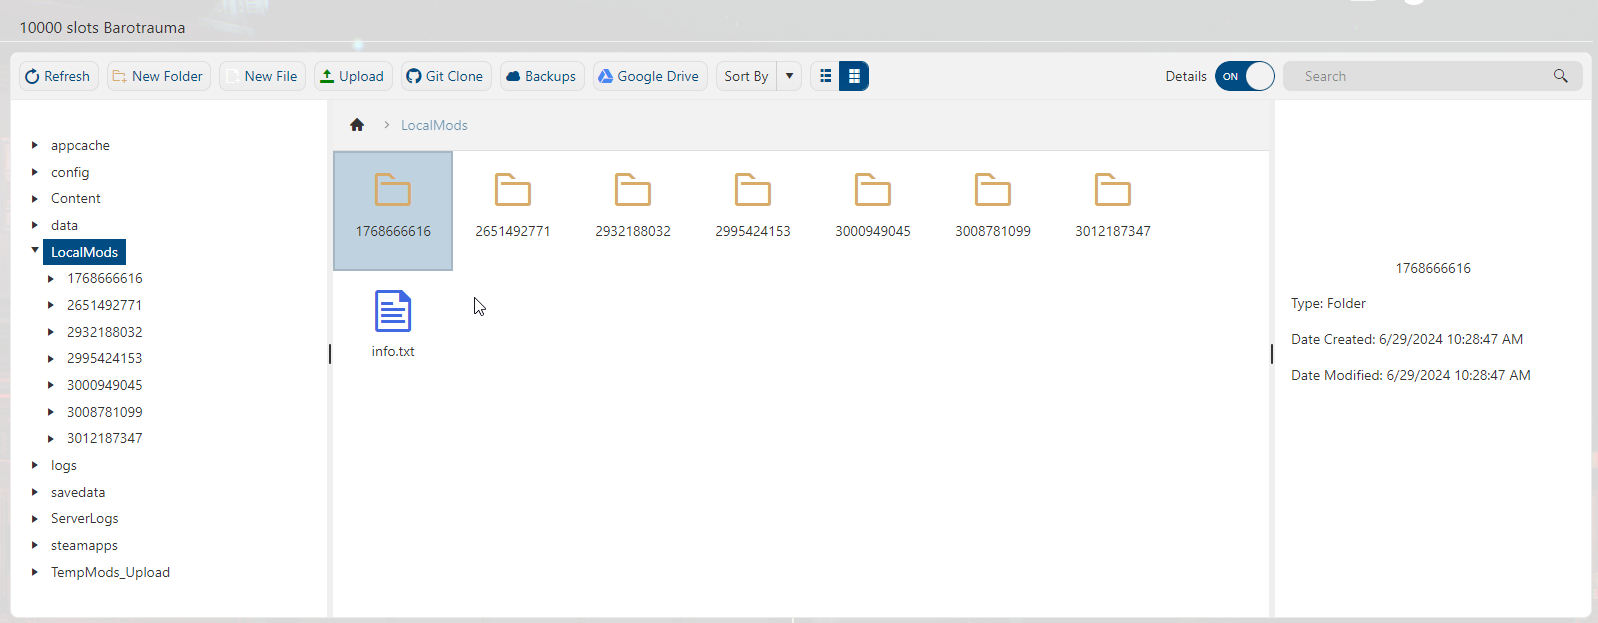
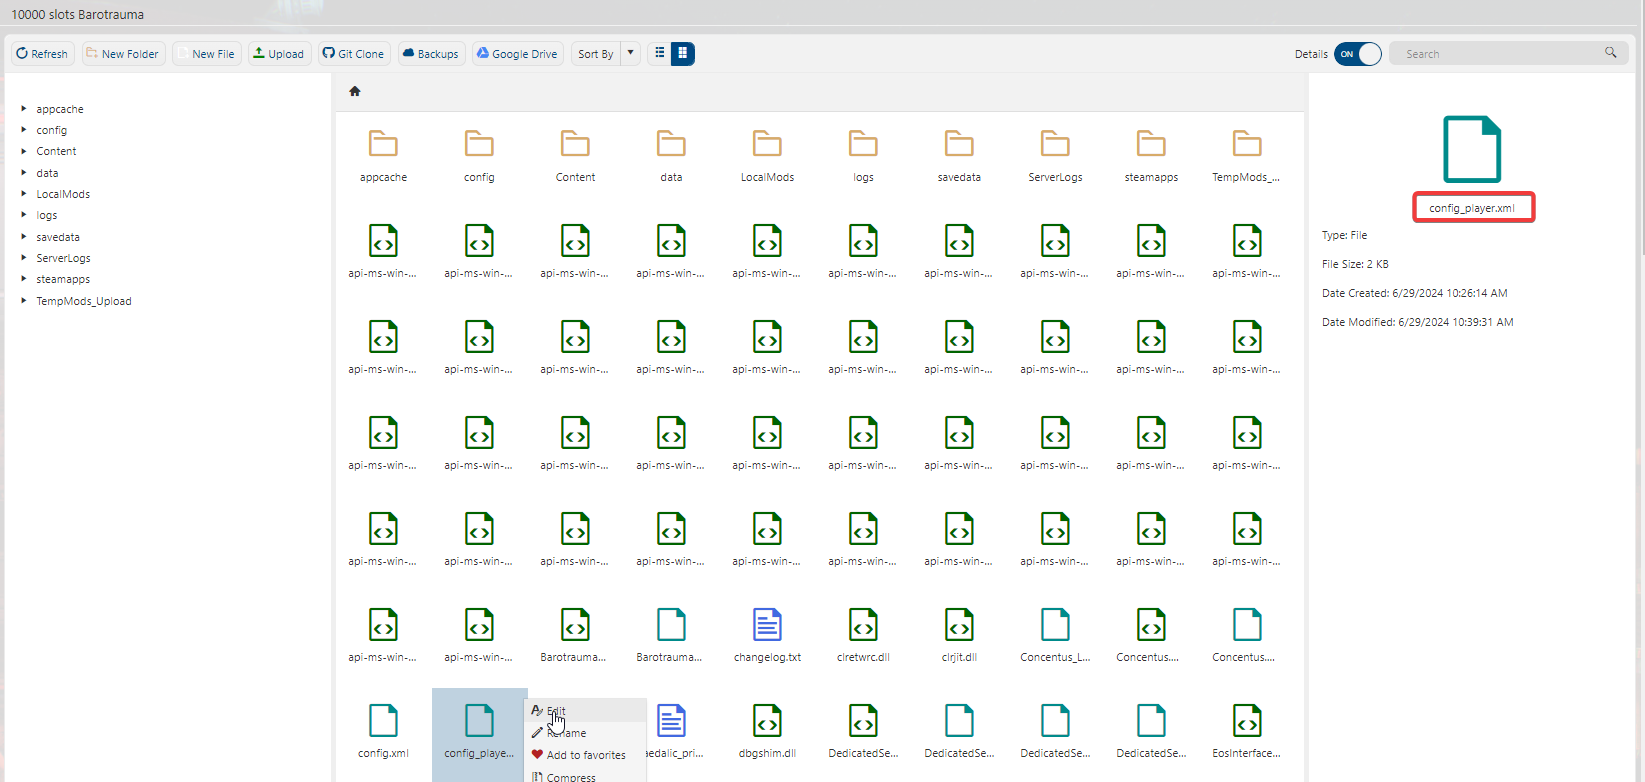
6. While in the File Manager, return to the home directory and locate the config_player.xml file.
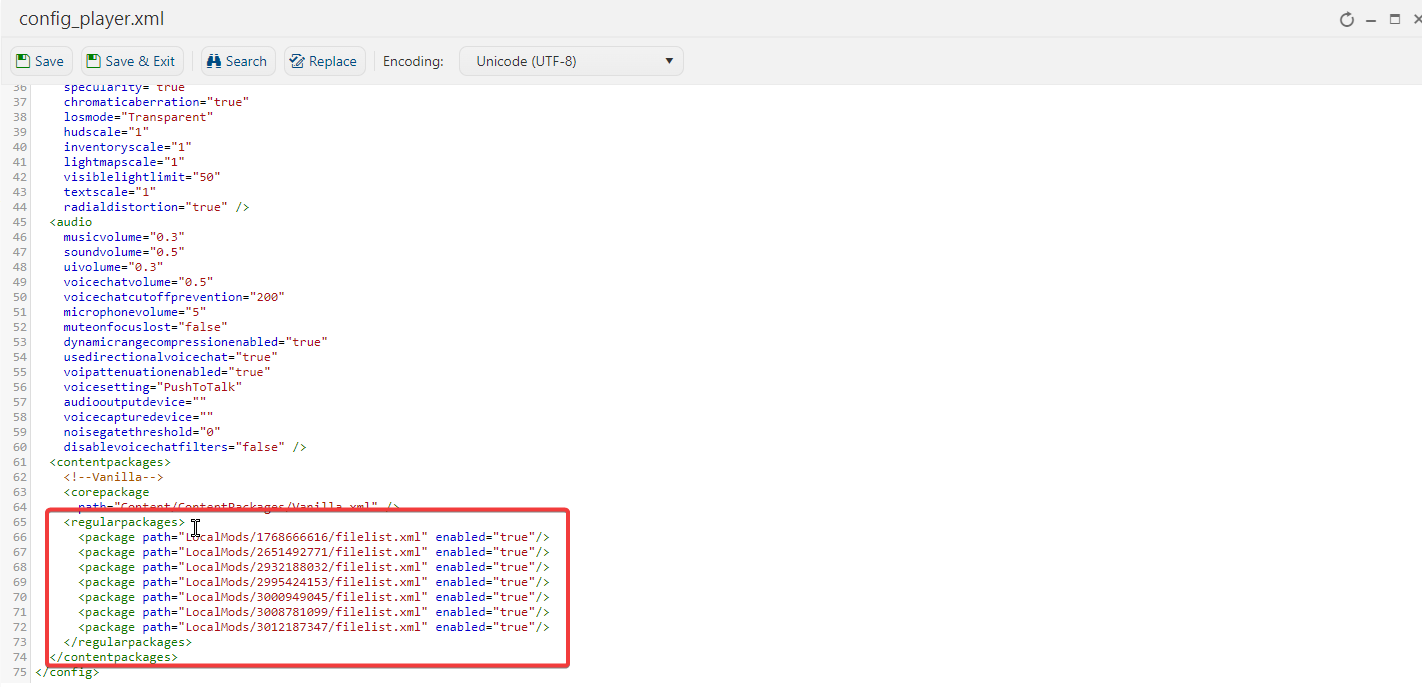
Right-click it and select Edit. Inside the file, scroll to the <contentpackages> section. For each mod you installed, add an entry in the following format:<package path="LocalMods/<FOLDER NAME>/filelist.xml" enabled="true"/>
Be sure to replace <FOLDER NAME> with the exact name of the mod folder you created.
Finally, confirm that the section ends properly with </regularpackages> on the line immediately above </contentpackages>.
7. Save and Restart
When you’ve finished adding all the mods, click Save to apply the changes.
Your server is now set up with mods. Start the server again and join it to confirm that the mods are working correctly.
Need further assistance? Please click here to contact our support via a ticket.

