This guide covers two easy ways to join your Valheim server—through the in-game browser or directly via Steam.
For the most reliable connection, we recommend using Steam’s server browser or adding your server by IP to your favorites.
How to Join Your Valheim Server
Option 1: Using the In-Game Server Browser
Note: New servers may take time to appear in the in-game list.
Step-by-Step Instructions:
(Optional) Log into your game control panel and check your server name in the Commandline Manager section.
To make your server easier to find, we recommend adding a special character like # at the beginning of the name (e.g. #MyServer).

Start Valheim and click on the Multiplayer tab.
Search for your server name (e.g. #MyServer). It may take several refreshes before it appears.
Option 2: Using the Steam Server Browser (Recommended)
Step 1: Access Steam’s Server Browser
Open Steam.
Click View on the top menu, then select Servers.
Method 1: Find via the "Internet" Tab
Click the Internet tab.
Click Change Filters.
Under Game, select Valheim.
Look for your server name and click Connect when you find it.
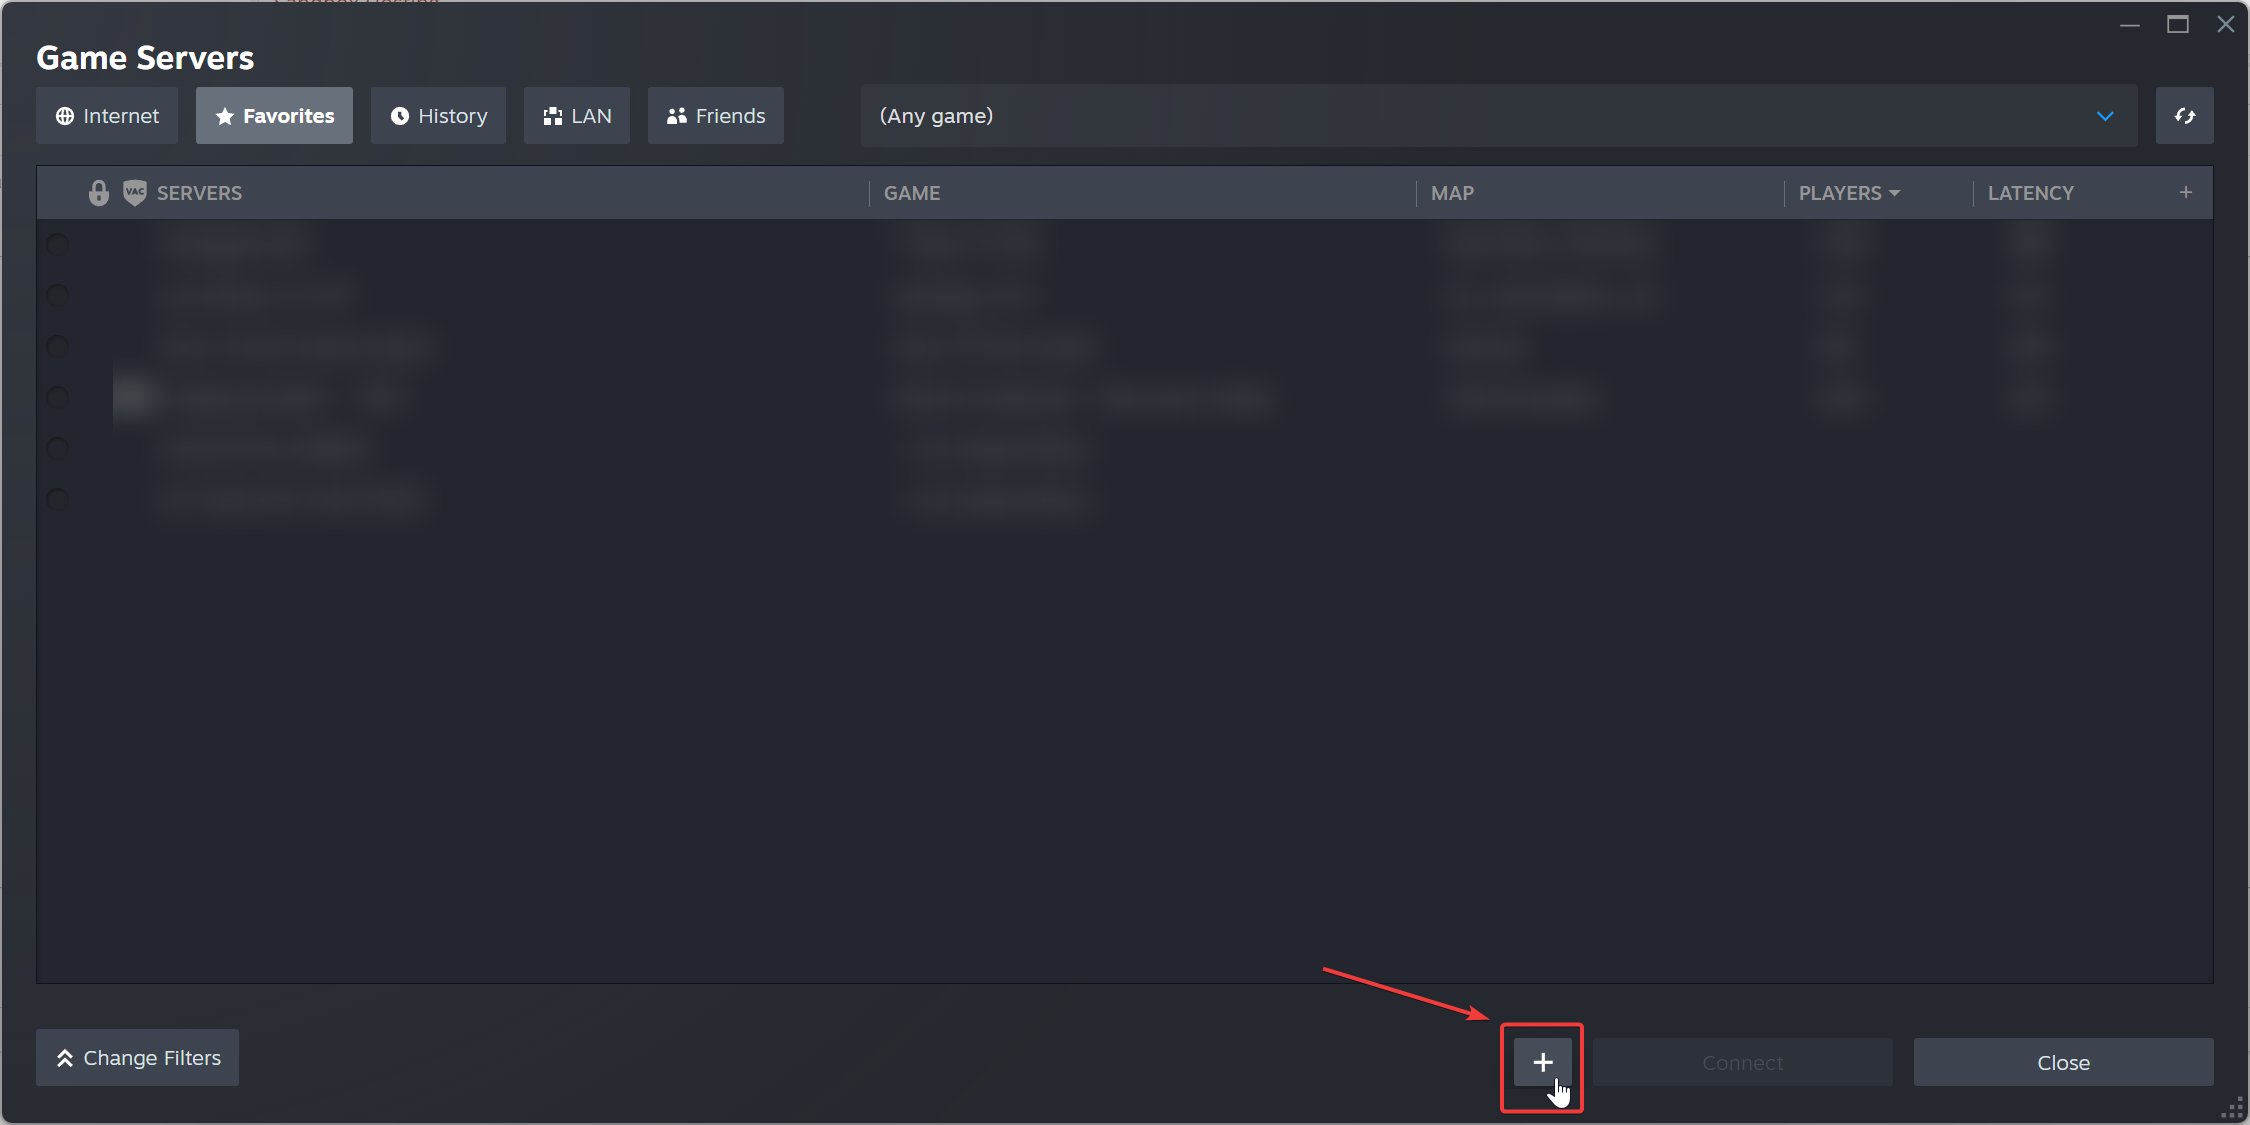
Method 2: Add Server via "Favorites" Tab (Direct IP Method)
Go to the Favorites tab.
Click Add a Server.

Enter your server's IP and query port (example: 4.4.4.4:27015).
Important: Make sure you use the query port, not the game port.
Click Find Games at This Address.
If your server is online, it will appear.
Click Add Selected Game Server to Favorites.
Your server will now always show in your favorites list.
Highlight it and click Connect, or right-click and choose View Server Info to see who's online.
If you're still having trouble, please contact our support team.
Click here to order your Valheim server with AA Game Hosting today!


