

This guide will show you how to upload a Custom World on your 7 Days to Die Server
Uploading a custom world to your 7 Days to Die server lets you create a unique survival experience tailored to your community. Whether you’re importing a handcrafted map, using a world generated through the in‑game tools, or deploying a custom world created with external editors, the process requires placing the correct files in the server’s directory and ensuring the configuration points to your new world. Because 7 Days to Die relies on specific folder structures and naming conventions, preparing and uploading your world properly is essential for the server to load it without errors. This guide walks you through everything you need, from preparing your custom world files to uploading them through your control panel or FTP to updating your server settings so the world loads on startup. By the end, your server will be running your custom world exactly as intended.
Uploading Custom Worlds to Your 7 Days to Die Server
1. Log in to your Game Panel.
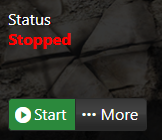
2. Before making changes, make sure the server is stopped.
3. Open File Explorer and browse to C:\Users\%user%\AppData\Roaming\7DaysToDie.
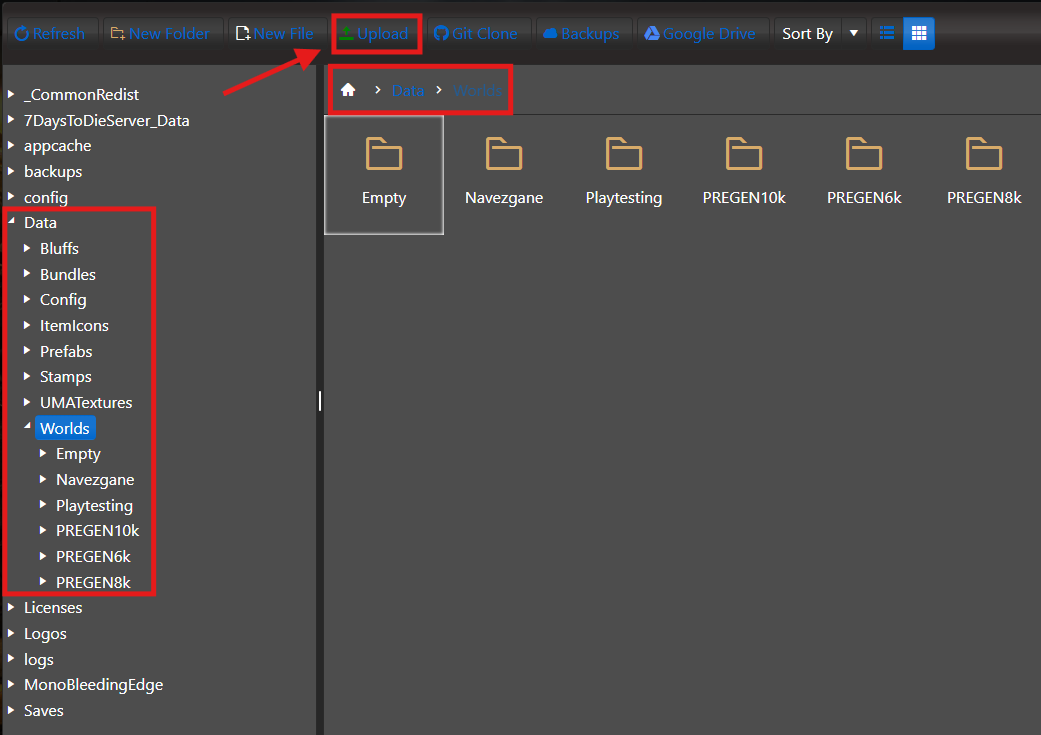
4. Upload your custom world folder from C:\Users\%user%\AppData\Roaming\7DaysToDie\GeneratedWorlds to <Home>/Data/Worlds using the File Manager in your Control Panel.
You can also use an FTP client like FileZilla for a more secure and reliable file transfer.
5. Upload only the Saves folder from your previous world located at C:\Users\%user%\AppData\Roaming\7DaysToDie\Saves and place it in <Home>/Saves using the server’s File Manager in your Control Panel.
You can also use an FTP client like FileZilla for a more secure and reliable file transfer.
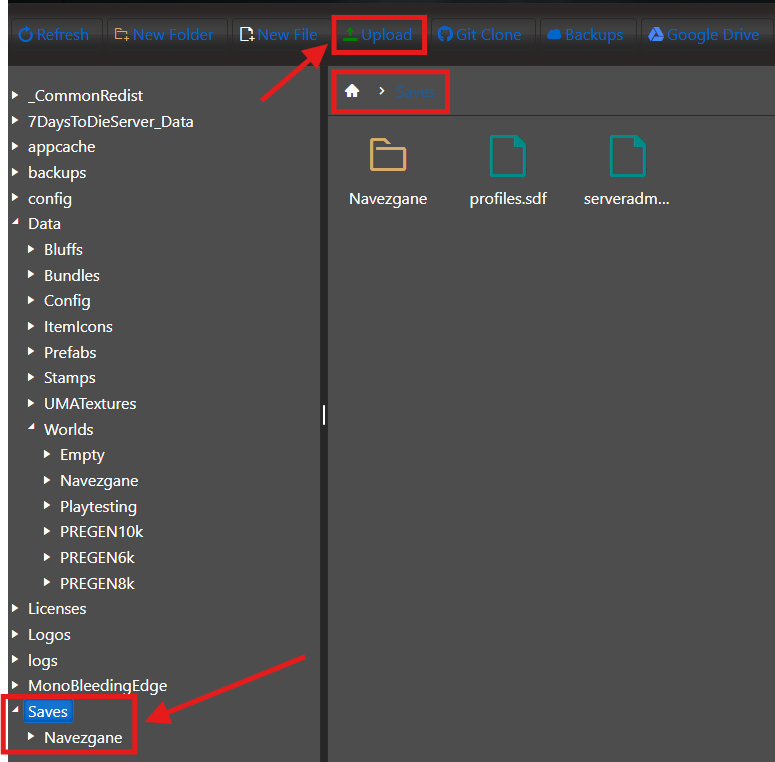
6. Open the Saves folder for that world, then copy the name of the save file inside it.
7. Navigate to the Configuration Files section on your server, then open serverconfigmain.xml using the Text Editor.
Scroll down to the World settings and update the GameWorld and GameName fields accordingly.
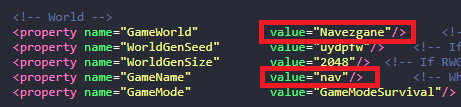
(Note: GameWorld should match the name of the world folder located in Data/Worlds. GameName is the name of the save file inside the world’s Saves folder located in /Saves.)
8. Start your server and check in‑game to confirm that the custom world has loaded as expected.

Did the above information not work for you?
Please click here to contact our support via a ticket.