
This guide will show you how set up genesis dlc on your ARK Survival Evolved Server.
ARK: Survival Evolved is known for its expansive worlds and immersive gameplay, and the Genesis DLC takes that experience to a whole new level. Whether you're venturing into the simulated realms of Genesis Part 1 or braving the alien landscapes of Genesis Part 2, setting up the DLC correctly on your server is essential for unlocking its full potential. This guide walks you through the process of installing and configuring the Genesis DLC on your ARK server whether you're hosting locally, using a dedicated machine, or renting from a game server provider. We'll cover everything from downloading the necessary files and updating server parameters to enabling the unique features that Genesis introduces, like mission systems, new biomes, and exclusive creatures.
Setting Up Genesis DLC on your ARK: Survival Evolved Server
1. Login to your Game Panel.
2. Before making changes, make sure the server is stopped.

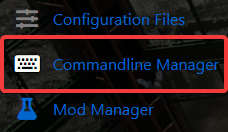
3. Navigate to Commandline Manager.
4. On the commandline manager, click Modify on the current and active commandline.
5. On the Server Map dropdown menu, select Genesis DLC Map".
6. Click Apply button to save it.
Start your server and explore the Scorched Earth Map!
