![]()
This guide will show you how to enable crossplay option on your 7 Days to Die server.
With the rise of multiplayer gaming across platforms, crossplay has become a must-have feature for survival games like 7 Days to Die. Whether your friends are on PC or console, enabling crossplay ensures everyone can join the same post-apocalyptic adventure without barriers. This guide walks you through the steps to activate crossplay on your server, allowing seamless gameplay between supported platforms. From adjusting server settings to verifying compatibility, we’ll make sure your server is ready to welcome survivors from all corners of the gaming world.
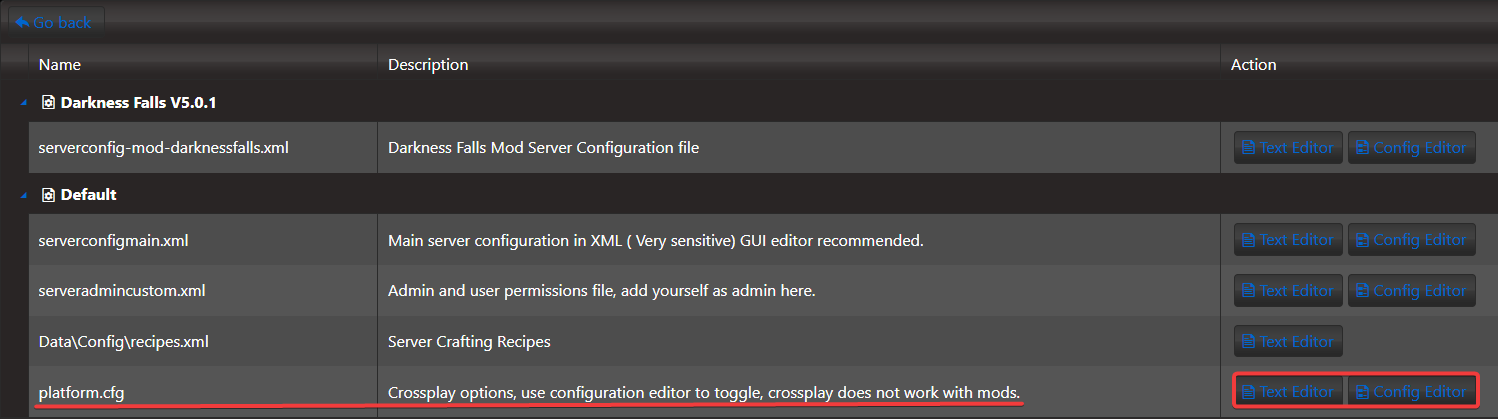
(NOTE: Console clients cannot join servers with mods. Always check if the server that you will be joining have mods. The recommend world size for crossplay is 8192. To know more about World Size click here.)
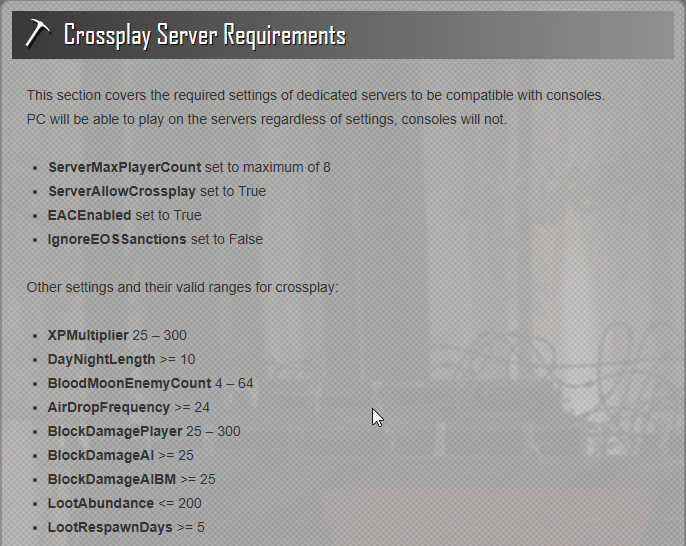
Requirement for Crossplay Option
Enabling Crossplay Option on your 7 Days to Die Server
1. Login to your Game Panel.
2. Before making changes, make sure the server is stopped.

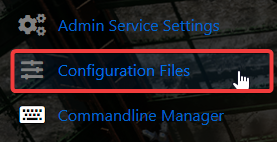
3. Navigate to Configuration Files.
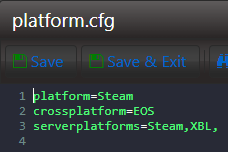
4. On the Configuration Files, look for platform.cfg file and you can click the both Text and Config Editor.
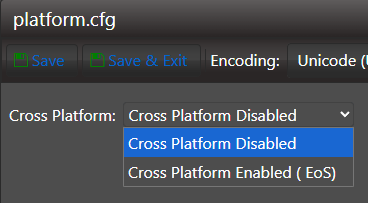
5. On the Config Editor, you can enable the EOS and on the hand, you can manually enable EOS by changing the value of crossplatform to EOS. You can also add the service platforms that you wanted to use for crossplay option.
Config Editor
Text Editor
6. After editing each editor, click the Save button to apply the changes on your server.

